


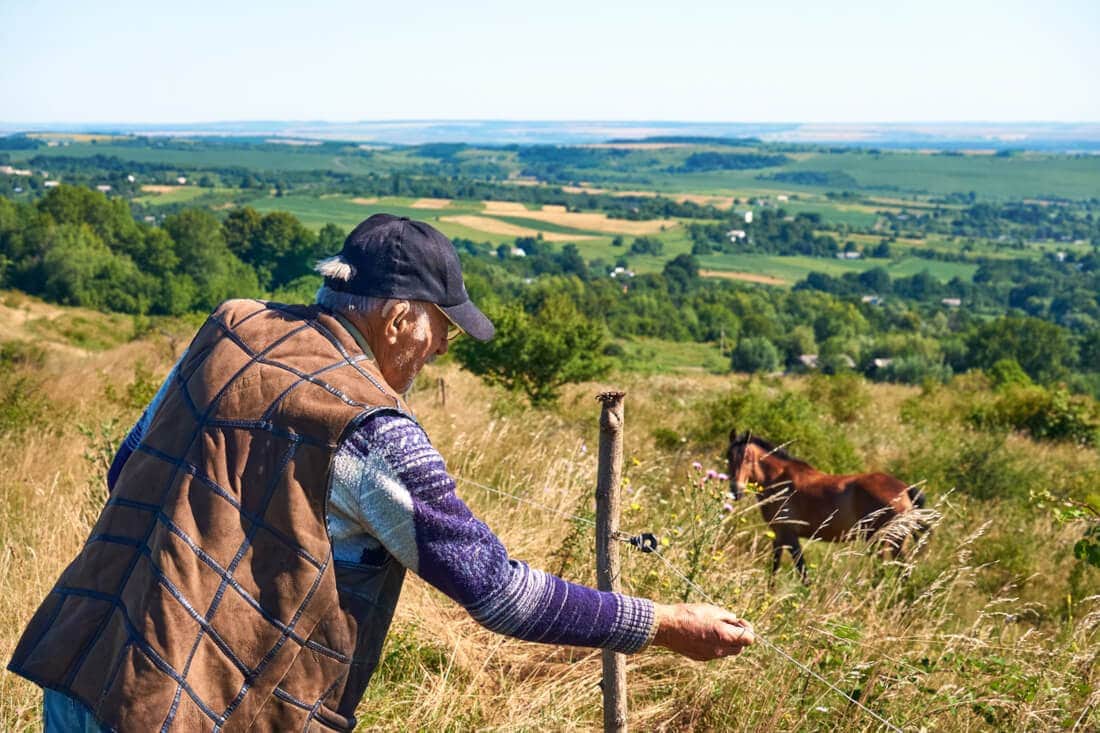
A safe, secure fence is one of the most important aspects of keeping your horse safe. Fencing contains your horse, reduces the risk of injury, and helps keep wildlife and unwanted animals out of pastures.
Because fences face constant pressure from weather, routine use, and the natural curiosity of horses, they inevitably wear down. Small issues like a loose board, sagging wire, or cracked insulator can quickly turn into serious safety hazards if ignored.
Being able to inspect, maintain, and handle basic repairs not only protects your horses but also saves you time and money in the long run. Whether your fence is wood, wire, electric, or a combination, understanding common problems and simple fixes is essential for keeping your property safe and functional.
Keep reading to learn everything you need to know so you are prepared to keep your horses and other livestock contained and safe.
Fencing for Horse Farms
Before making any repairs, it’s important to understand the type of fencing you have and the kinds of issues that may affect it. Many farms use a combination of fence types, such as wood along the road for visibility, wire in large pastures, and electric lines as a top strand, which means each section may require different tools, techniques, and inspection habits.
Knowing the materials you’re working with can make for quicker fixes and help prevent small problems from becoming bigger hazards.
Types of fences and their specific issues include: [1][2][3][4][5]
- Wood: Board, post-and-rail, or split rail fences are sturdy and highly visible for horses. They can rot at ground contact, splinter, or have loose nails over time, especially in wet or humid climates. Pressure-treated or stained wood can extend lifespan.
- Wire: Woven, high-tensile, and electric wires are strong, cost-effective, and cover large areas efficiently. Wires can sag, break, or pull loose from posts, and posts may lean. High-tensile wire requires careful handling due to recoil risk.
- PVC or Vinyl: Low-maintenance and resistant to rot, insect damage, and weathering. Panels can crack under impact, and posts or brackets may shift or loosen.
- Pipe: Made from galvanized or coated steel, pipe fencing is extremely durable and can withstand horse pressure, kicking, and heavy use. Rails can bend, bolts may loosen, and welded joints can rust over time.
- Electric: Single or double strand, poly tape, or wire electric fences provide flexible containment. Broken wires, faulty insulators, or grounding issues reduce effectiveness and can pose hazards. Always turn off power before repairs, replace damaged components, and test voltage to ensure proper operation.
Table 1. Comparison of fence types and repair needs
| Material | Type of Damage | Tools Needed | Cost to Maintain |
|---|---|---|---|
| Wood |
|
|
Medium |
| Wire |
|
|
Low |
| PVC or Vinyl |
|
|
Medium |
| Pipe |
|
|
High |
| Electric |
|
|
Low |
Fence Repair Prep
Fence repairs on horse farms are often simple, but they can involve sharp edges, heavy posts, and (in the case of electric fencing) live current.
Key safety tips and preparation can protect you and your horses.
Safety First
Fence repairs are generally straightforward, but safety should always come first. Horses are naturally curious, so make sure your horses are kept away from the work area until repairs are complete.
Key safety practices include: [4]
- Wear Protective Gear: Gloves, safety glasses, and sturdy footwear keep you safe during repairs
- Inspect Tools Before Use: Check for damage or loose parts that may cause issues while in use
- Turn Off Electric Fencing: Always verify wires are not live before handling
- Keep the Work Area Clear: Remove debris and maintain a stable footing
- Work Slowly and Deliberately: Rushing increases the risk of accidents
By following these precautions, you protect yourself, your horses, and your fence.
What's your top priority with your horse's health?
Enter your email to receive your store credit
Basic Repair Tools & Materials
Having the right tools and materials on hand makes fence repairs faster, safer, and more effective.
For wooden fences, a hammer and nails or screws are essential, along with a screwdriver or drill for tightening loose boards. A measuring tape and level help ensure rails are straight, while a saw may be needed to trim or replace damaged boards. [4]
Metal and wire fences may require pliers and wire cutters to handle broken strands, as well as fencing staples or tensioning tools to maintain proper tension. Replacement wire or posts may also be necessary if sections are badly damaged.
PVC fences are low-maintenance, but cracked panels or loose posts require replacement. This requires basic hand tools such as a hammer or mallet.
Electric fences require extra caution. Always turn off the power before starting and have replacement insulators, wire, or tape available. Checking that the grounding system is functional ensures the fence works properly once repairs are complete.
Some essential tools and materials to keep handy include:
- Hammer, mallet, and screwdriver
- Pliers and wire cutters
- Measuring tape and level
- Nails, screws, or fencing staples
- Replacement boards, wire, or posts
- Insulators for electric fencing
Being prepared with the right tools and materials helps the repair process go smoothly, reduces the risk of mistakes, and keeps your horses safe and secure.
Common Fence Repairs
Repairing fences doesn’t have to be an overwhelming task. By following clear steps and using the right tools, most horse owners can handle common problems safely and effectively.
Rigid Panel Fences: Wood, PVC, Pipe
Begin by walking the fence line carefully, inspecting each panel, rail, or post for signs of damage such as cracks, bends, leaning posts, loose fasteners, or rusted joints. Use a level to check posts and rails, and wear gloves to protect your hands from splinters or sharp metal edges. [6]
Carefully remove damaged sections you identify. For wood, measure and cut a replacement board, then secure it with nails or screws. Using pressure-treated lumber can help prevent future rot. PVC panels are simple to slide into place, but be careful not to overtighten screws or brackets, and ensure posts remain aligned.
Pipe fencing, while very strong, may need bent rails straightened, bolts tightened, or rusted welds inspected. Corner posts and gates are particularly important to check, as they bear extra stress and may require additional bracing.
If posts are loose or leaning, resetting them in gravel or concrete may be necessary. This involves digging carefully, leveling the post, and allowing concrete to cure fully before reattaching rails. Taking the time to secure posts properly ensures the repaired section will hold up to horse pressure and weather conditions.
Key tools and materials include: [6]
- Claw hammer or pry bar
- Screwdriver or drill
- Soft mallet
- Measuring tape
- Level
- Saw
- Nails
- Screws or brackets
- Replacement panels or boards
- Post hole digger
- Gravel or concrete
- Gloves
- Safety glasses
Wire Fences: Woven or High-Tensile
When checking wire fences, pay careful attention to tension and secure posts. Start by walking the fence and checking for sagging wires, broken strands, leaning posts, or sharp edges. Use a tape measure for spacing and a level to confirm posts are upright. [1]
To tighten sagging wires, a fencing stretcher or come-along allows you to apply controlled tension safely. Locking pliers or vice grips can hold the wire while you fasten it to posts. Broken strands should be removed and either spliced or replaced using crimp sleeves or wire connectors, then secured with staples or clips. Loose posts may need to be reset in gravel or concrete, particularly corner posts under tension. [1][4][7]
High-tensile wire can be dangerous if mishandled, as it may snap back with significant force. Gloves and safety glasses are essential, and working slowly and deliberately will minimize the risk. [4]
Key tools and materials include: [7]
- Fencing stretcher or come-along
- Pliers
- Locking pliers
- Wire cutters
- Crimp sleeves or wire connectors
- Fencing staples or clips
- Replacement wire
- Post hole digger
- Gravel or concrete
- Gloves
- Safety glasses
Electric Fences
Electric fences are highly effective for containing horses but require careful handling to ensure safety. Always assume the fence is live and turn off the power before starting any repairs, then confirm with a voltage tester that the fence is de-energized before touching it. [8]
Gloves and safety glasses are essential, and insulated gloves, long sleeves, and rubber-soled boots provide additional protection when working near high-tensile or live wires.
Begin by walking the fence line to inspect wires, tape, insulators, and grounding connections. Damaged or missing insulators must be replaced immediately, as they prevent wires from contacting posts or the ground, which can create dangerous shorts. [5][6][9]
The grounding system should also be checked to ensure it is functioning correctly, since inadequate grounding can reduce the effectiveness of the fence and increase the risk of shock. [5][6][9]
When repairing the fence, replace broken wire or tape and secure it to posts with proper insulators. High-tensile wires require careful handling, as improper tensioning can cause the wire to snap back dangerously. Vegetation growing near the fence should be trimmed to prevent shorts or accidental shocks to horses and humans.
After completing repairs, turn the power back on and test the fence with a voltage tester to confirm it is operating properly. Throughout the repair process, keep horses safely contained away from the work area, using temporary fencing if necessary.
Key tools and materials include: [8]
- Voltage tester
- Insulated gloves
- Safety glasses
- Pliers, wire cutters
- Spare insulators
- Replacement wire or tape
- Post hole digger if posts need resetting
General Tips for Fence Repairs
Maintaining any type of fence requires a proactive approach.
Following a few simple guidelines can help keep your fences functional and your horses safe: [6][7][9]
- Inspect Regularly: Walk the fence line frequently to catch loose posts, sagging rails, or minor cracks before they become major hazards.
- Work Methodically: Repair one section at a time to ensure consistency and thoroughness. Use temporary fencing if horses need to be contained while repairs are in progress.
- Put Safety First: Always wear gloves and safety glasses. For high-tensile or electric fences, insulated gloves, long sleeves, and rubber-soled boots provide extra protection.
- Use Proper Tools: Employ tools appropriate for each fence type, such as fencing stretchers or come-alongs for wire, or voltage testers for electric fences.
- Check Posts and Bracing: Corner posts or heavily loaded sections may require extra bracing to maintain stability and prevent sagging.
- Manage Vegetation: Trim nearby grass, weeds, and tree branches to prevent rubbing, shorts, or interference with fence function.
Following these general tips ensures your fences remain reliable and reduces the risk of injury for both horses and humans.
Preventive Measures
Regular preventive maintenance keeps fencing safe and reduces the need for major repairs. A quick monthly walk of the fence line is usually enough to catch early problems and address them before they escalate.
Focus on the basics, including: [6][10]
- Wood: Tighten loose nails or screws, replace cracked or warped rails, and check posts for early rot, especially where wood meets damp soil.
- Wire: Monitor tension, repair broken strands promptly, and make sure posts supporting tensioned sections stay firmly anchored.
- Electric: Look for cracked insulators, sagging tape, or vegetation touching the line, and test voltage at a few points to confirm the system is functioning evenly.
- PVC: Check for hairline cracks, UV-related brittleness, or panels that have shifted out of place. Tighten or replace hardware before panels warp or loosen, and straighten posts before alignment issues spread to adjoining sections.
- Pipe: Inspect for bent rails, loose bolts, or rusted welds. Ensure all corner posts and gates remain secure and check connections where sections meet.
After storms or freeze-thaw cycles, check for leaning posts, washed-out ground, or damaged hardware. Staying ahead of these small issues keeps fences functional year-round without needing constant major repairs.
Winterizing Fencing
Winter adds extra stress to fencing, so preparing your fences before the ground freezes can save you time and effort later. The goal of winterizing is to tighten any loose hardware, replace what’s already weakened, and prevent hidden damage under snow or ice.
Key steps for each fence type include: [1][10]
- Wire Fences: Lightly adjust tension. Wires contract in cold weather, so avoid over-tightening. Confirm corner braces are strong.
- Wood, PVC, and Pipe: Replace cracked, bent, or rotted components now while digging and fastening are still easy. Reset leaning posts before frost heave worsens the problem. Apply protective treatments to wooden posts and rails to resist moisture and freezing conditions. For pipe fencing, check bolts, joints, and welds, and clean any rust to prevent corrosion.
- Gates and Hardware: Check that gates open and close smoothly. Lubricate hinges and latches with products rated for cold weather to prevent sticking or freezing.
- Electric Fences: Inspect insulators for brittleness, trim vegetation to prevent it from freezing onto wires, and ensure the grounding system is solid, since frozen soil can reduce conductivity.
- Visibility: Mark low wires or corners if drifting snow tends to hide them.
Taking these precautions in late fall helps fences withstand storms, deep snow, and extreme temperatures, keeping horses and property safe throughout winter.

Costs & Planning
Fence repairs and maintenance vary in cost depending on the extent of damage, the materials involved, and whether you handle the work yourself or hire a professional. Planning ahead helps you manage both time and budget while keeping your horses safe. [1][3][4]
Routine inspections and preventive maintenance are usually inexpensive and often prevent larger, more costly repairs. Minor fixes like tightening fasteners, replacing a broken board, or splicing a wire are manageable for most horse owners. Major repairs, such as resetting posts in concrete or replacing multiple panels, require more materials, labor, and time, which can quickly add up.
Here are some tips to manage repair costs effectively: [7]
- Keep a basic repair kit with commonly used tools and materials on hand. This reduces the need for trips to the store or professional help mid-job.
- Plan and budget seasonally, factoring in costs for repairs after storms, winter preparation, and replacement of worn-out components.
- Use your acreage strategically. Rotational grazing provides opportunities for maintenance while pastures are not in use.
Research current repair costs and plan ahead to maintain safe, durable fencing while balancing budget and time.
When to Call a Professional
While many fence repairs can be handled by a property manager, there are situations where professional help is safer and more efficient.
Consider calling a professional if: [1][3][4]
- Posts are severely damaged or leaning, especially corner or tensioned posts that support wire or high-tensile fences.
- High-tensile or electric fences require major adjustments. These can be dangerous if not properly installed or tensioned.
- Large sections of fence need replacement, including multiple panels or extensive wire runs.
- Specialized tools or expertise are required; for example, heavy post-setting equipment, concrete work, or troubleshooting complex electric fencing systems.
- You’re unsure about safety. If a repair could put you or your horses at risk, it’s better to call someone experienced.
Using a professional doesn’t replace regular inspections or preventive maintenance, but it ensures that major repairs are completed safely and correctly, protecting both your horses and your property.
Frequently Asked Questions
Here are some frequently asked questions about fence repairs on horse farms:
Yes, basic repairs such as tightening wire, replacing boards, fixing posts, or adjusting gates can be done by horse farm owners. Larger repairs involving high-tensile or electric fencing may require a professional to ensure horse safety.
Fence repair costs depend on the type of horse fencing, materials used, and labor required. Small pasture fence repairs are usually inexpensive, while resetting posts or replacing multiple fence panels can increase costs.
Fences on horse farms should be inspected at least once a month and after storms. Seasonal inspections before winter and spring turnout help prevent safety issues and costly repairs.
Wear gloves and safety glasses when repairing horse fencing. Use insulated gloves for electric or high-tensile fences, keep horses away from the repair area, and remove sharp edges or exposed nails.
Summary
Fence repair is an important part of farm maintenance and helps keep your horse safe and contained.
- Regular inspections and preventive maintenance keep fences safe, functional, and reduce costly repairs
- Understanding the strengths and weaknesses of wire, wood, PVC, electric, and hybrid fences helps owners manage repairs effectively.
- Using proper tools and safety gear makes repairs easier and reduces the risk of injury.
- Step-by-step repair guidance covers common issues like sagging wires, broken rails, leaning posts, and electric fence faults.
- Winterizing fences and planning for seasonal changes protects against frost, snow, and cold-related damage.
- Knowing when to call a professional ensures major repairs or dangerous situations are handled safely and correctly.
References
- Martinson. K. Horse Fencing Considerations. University of Minnesota Extension. 2021.
- Skinner. J. et al. Farm Pasture Fencing. Rev. Agriculture Canada, Ottawa. 1980.
- Roberson. G. T. & Mowrey, R.A. Fences for Horses. North Carolina Cooperative Extension Service. 2005.
- New Fence Construction. British Columbia Ministry of Agriculture. 2015.
- Fischer. L. & German. M. Everything You Need to Know About Electric Fencing. Manitoba Agriculture.
- Wand. C. Best Practices for Keeping Your Livestock Contained. Ontario.ca. 2021.
- Wheeler. E. & Smith-Zajaczkowski. J. Fence Planning for Horses. PennState Extension. 2016.
- Introduction to Electric Fencing - BC Ministry of Agriculture. British Columbia Ministry of Agriculture. 2015.
- Reducing Wildlife Conflict with Electric Fencing: A Beginner's Guide. Government of Yukon. 2018.
- Preparing for Winter: Lord Nelson Style. Rutgers University. 2023.


