


Proper hoof care is essential for maintaining a horse’s overall health and performance. Whether your horse has a minor hoof injury, an abscess, or a crack that needs protection, knowing how to apply a hoof bandage is a valuable skill for any horse owner or caretaker.
Hoof bandages are flexible wrappings designed to safeguard a horse’s hoof, keeping it clean and dry. They protect wounds from dirt and bacteria, prevent further damage, and promote healing in a stable environment.
Although bandaging a hoof can feel intimidating at first, with the right tools and a clear process, you can confidently care for your horse’s hoof and support its recovery.
In this guide, we walk you through the materials you need, the steps to take, and tips to ensure the bandage remains secure and comfortable.
Why Use Hoof Bandages for Horses?
Horse hooves are susceptible to many different injuries that can compromise the integrity of the hard hoof capsule. Common injuries to the hoof that may require a bandage include: [1]
- Puncture wounds
- Lacerations or other injuries to the coronary band
- Injuries causing separation or loss of a portion of the hoof capsule
- Hoof abscesses
Leaving injuries exposed to the environment allows foreign materials to come into contact with the hoof, including: [2]
- Moisture
- Soiled bedding
- Urine
- Manure
Contamination from these sources can complicate healing by introducing bacteria into the wound, leading to infection. Depending on the severity and location of the injury, an infection may migrate into the internal structures of the hoof and become very difficult to treat.
Types of Hoof Bandage
The type of hoof bandage applied depends on the injury and the purpose of the bandage. Bandages typically have three layers: [2]
- Primary or contact layer: This is the layer directly in contact with the injury site. Your veterinarian may recommend applying topical medications, such as antibiotics, to the primary layer.
- Secondary layer: Provides absorption and padding to protect the injury. This layer is optional and often unnecessary in hoof bandaging.
- Tertiary layer: The layer that secures and protects the underlying bandage. In some cases, it may also provide a supportive role helping maintain normal function of the bandaged area.
Most hoof bandages do not have a secondary layer, as the hoof capsule itself provides adequate protection for the healing injury. [1]
Choosing the composition of the primary layer depends on the goals of the bandage. Most hoof bandages are dry-to-dry bandages, which means a dry layer is in contact with the injury site and left in place until any fluids leaking from the wound dry up. [1]
Your veterinarian may recommend a wet-to-dry bandage in cases where granulation tissue (“proud flesh“) develops, as these bandages adhere to the granulation tissue and pull it off during bandage removal. [1]
Common primary layers include: [3][4]
- Plain gauze
- Poultice pad
- Gauze soaked or packed with sugardine, a homemade poultice made from sugar and povidone-iodine
- Gauze soaked or packed with Epsom salts
- Gauze soaked in antiseptic products, such as povidone-iodine or chlorhexidine
Always follow your veterinarian’s recommendations about primary layers for hoof bandages.
What's your top priority with your horse's health?
Enter your email to receive your store credit
Bandaging Materials
Before applying a bandage, ensure you have all the materials you need. Typical supplies include: [5]
- Duct tape
- Bandage scissors
- Elastic adhesive bandage, such as Elastikon®
- The primary layer materials recommended by your veterinarian
- Tertiary layer materials
There are several possible tertiary layer materials you can use for your bandage. The most important features of the tertiary layer are:
- Durability, to resist wear and tear as the horse walks on the bandage
- Waterproofing, to prevent urine and other fluids from contaminating the injury site
- Protection, to prevent further injury to the hoof capsule
The most common tertiary layer is a square of cotton padding applied to the bottom of the foot. The cotton padding is held on by wrapping brown gauze or elastic adhesive bandage around the foot. [6] Alternatively, a size 3 or 4 diaper can replace the cotton padding and gauze. [5][6]
For durability and waterproofing, most practitioners recommend using a woven layer of duct tape applied to the bottom of the horse’s hoof. [5][6] This layer resists abrasion and friction as the horse walks, protecting the underlying bandage. [6]
For horses living in very wet or muddy conditions, or injuries requiring a high degree of waterproofing, your veterinarian may recommend using a specialized medicine boot to add an additional layer of protection and waterproofing. Alternatively, a polythene bag, such as an empty IV fluid bag, can be used to make a waterproof sock that protects the bandage materials. [2] This is typically combined with a duct tape patch to further improve durability and water resistance.
Application Guide
Hoof bandaging generally follows the same steps, with some variation depending on the preferred materials. The basic steps are:
- Weave duct tape patch
- Apply primary layer
- Apply tertiary layer
- Cover with duct tape patch
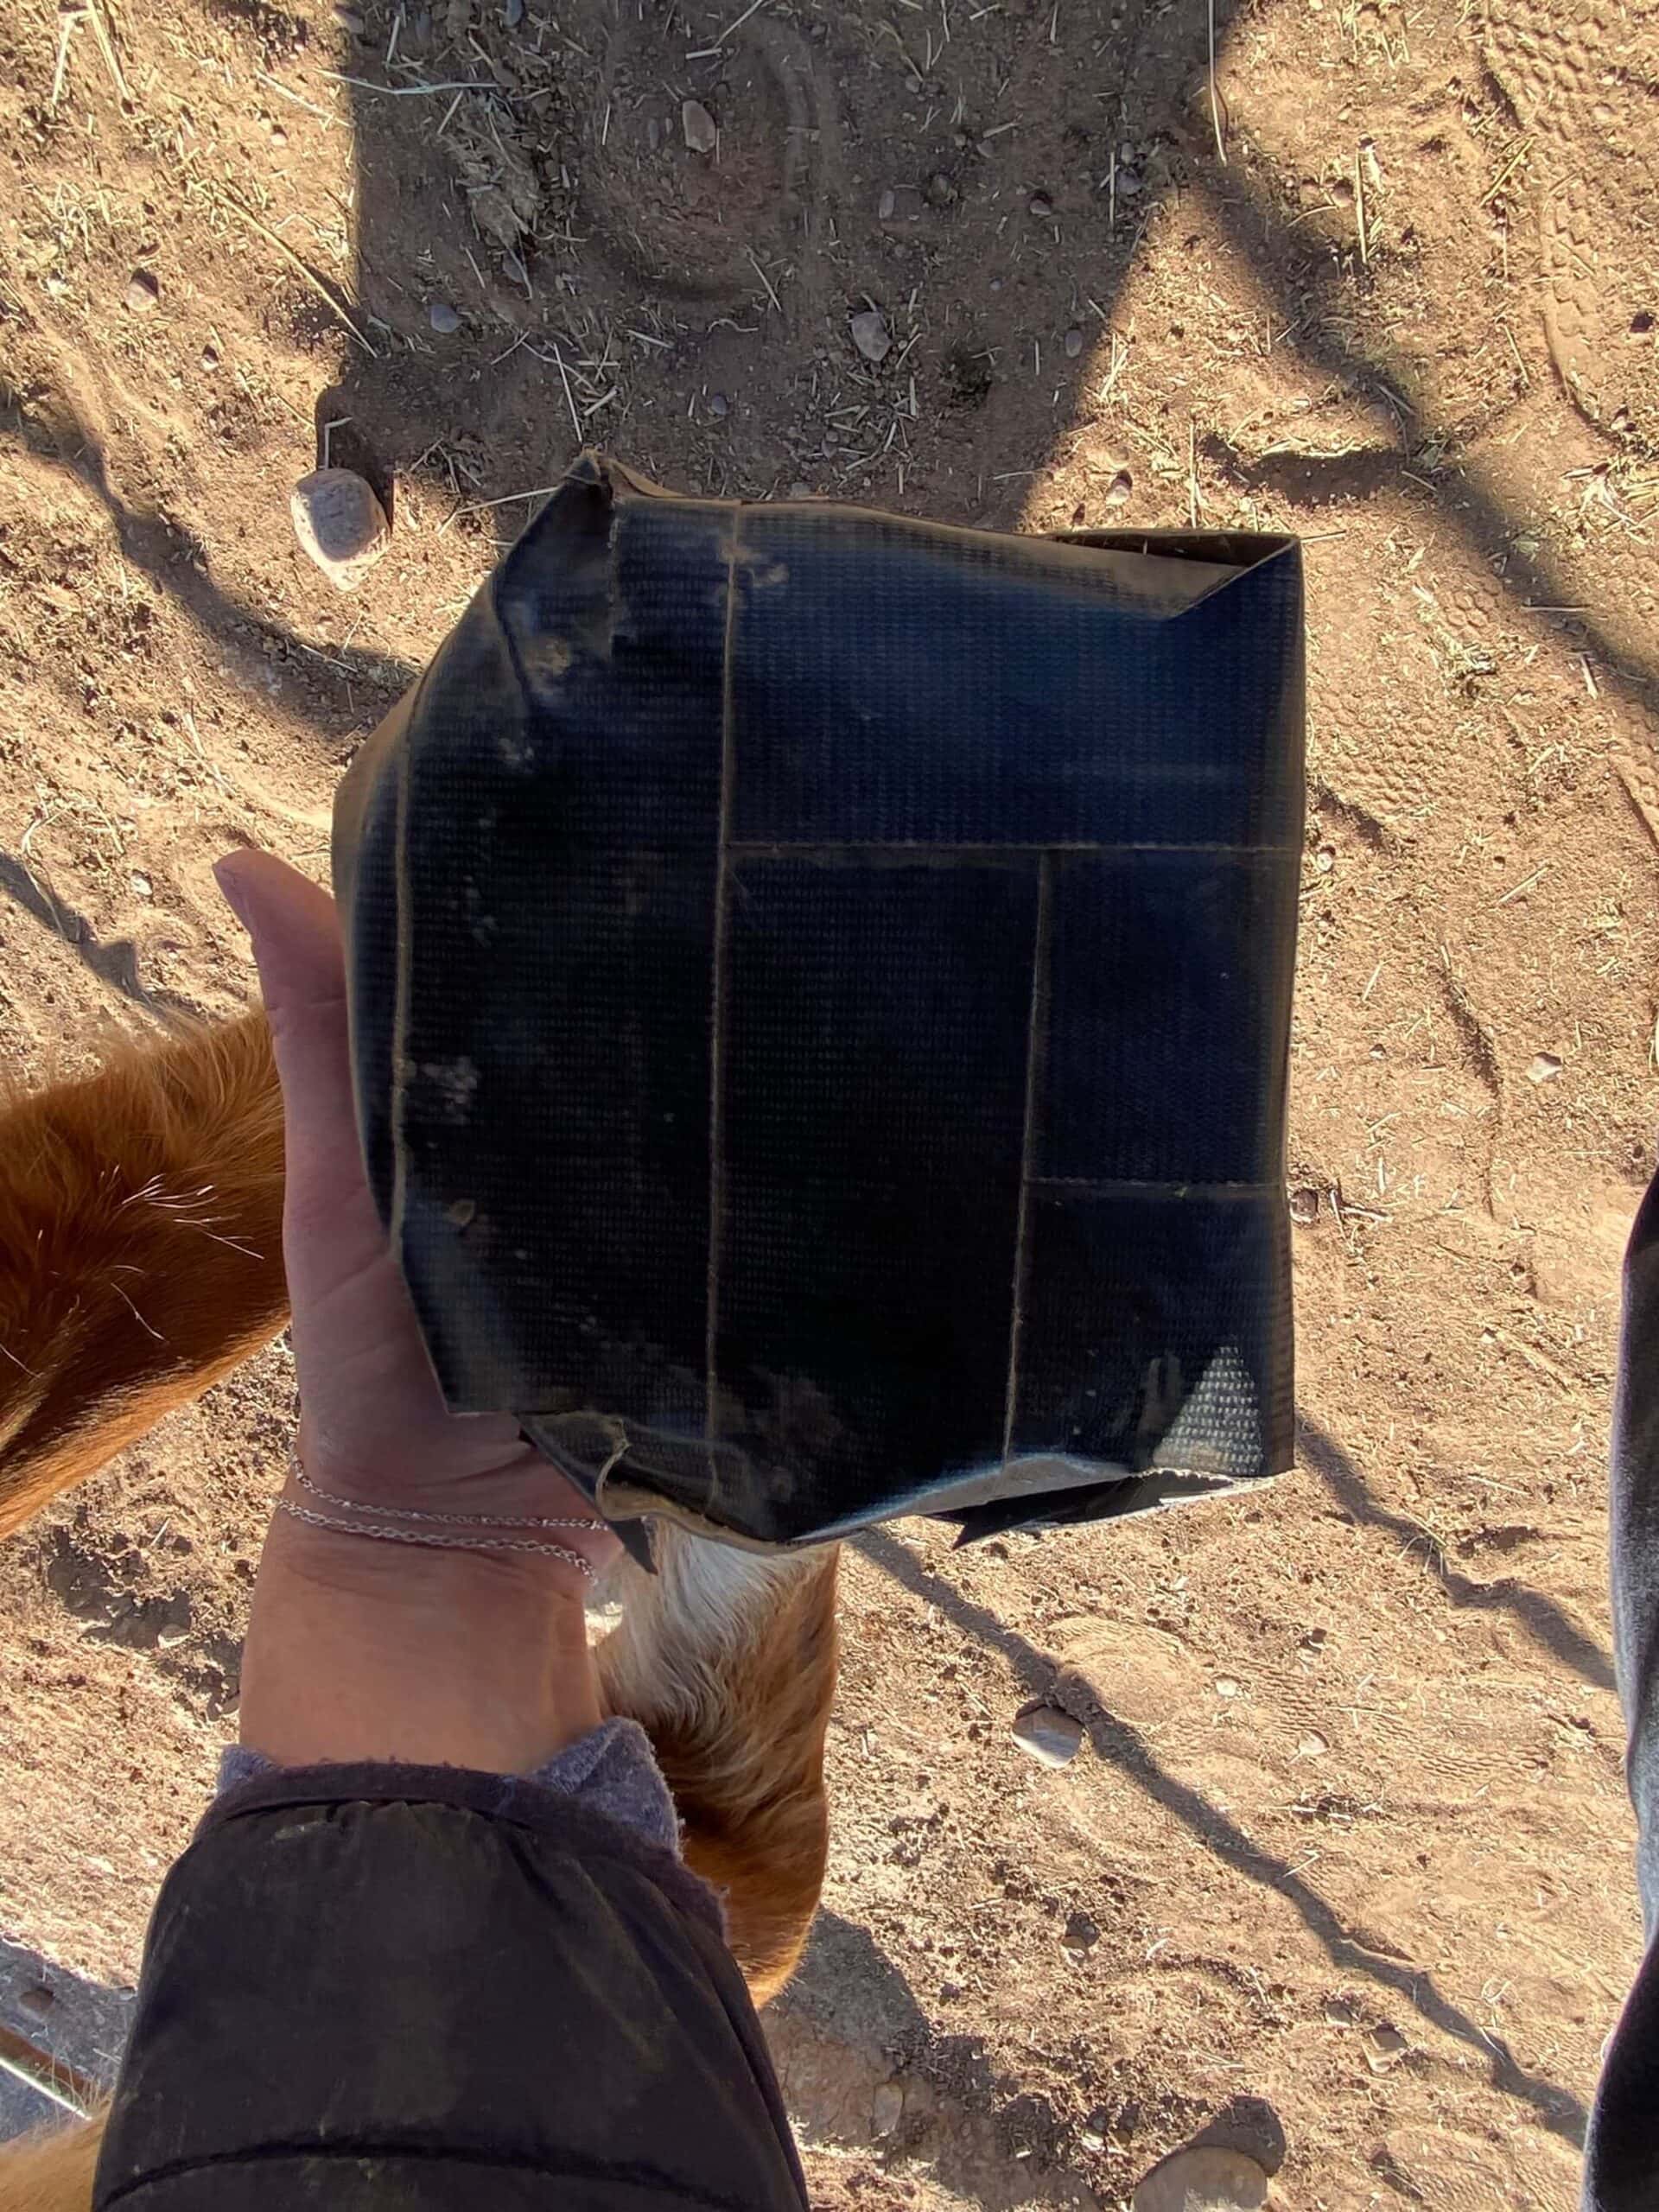
1. Weave Duct Tape Patch
Before applying a hoof bandage, make a woven duct tape patch to protect the final bandage from wear. To make the duct tape patch: [6]
- Place two 30 cm (12 in) long strips of duct tape on a wall or clean surface so the two strips form a 90º angle
- Place a second set of 30 cm (12 inch) strips on the inside of your first set so the layers overlap in a cross-hatched pattern
- Repeat until you have a complete 30 cm x 30 cm square of cross-hatched duct tape
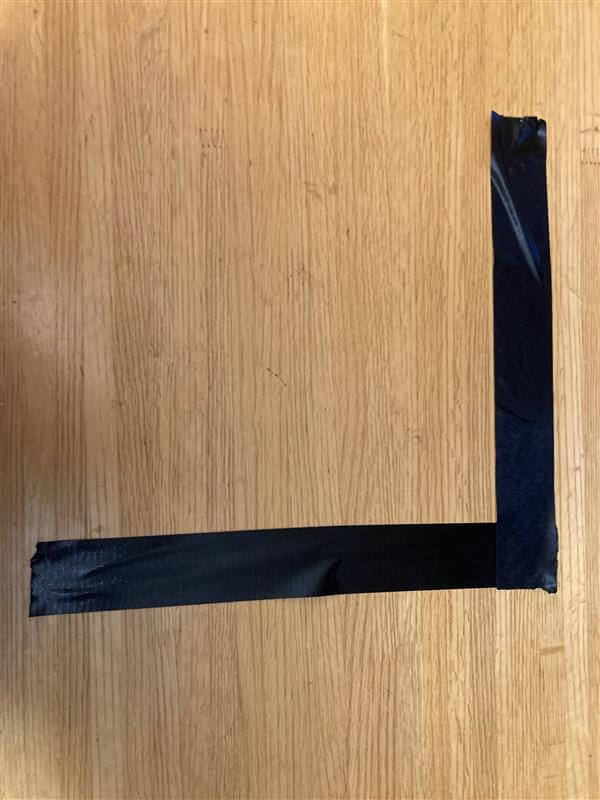
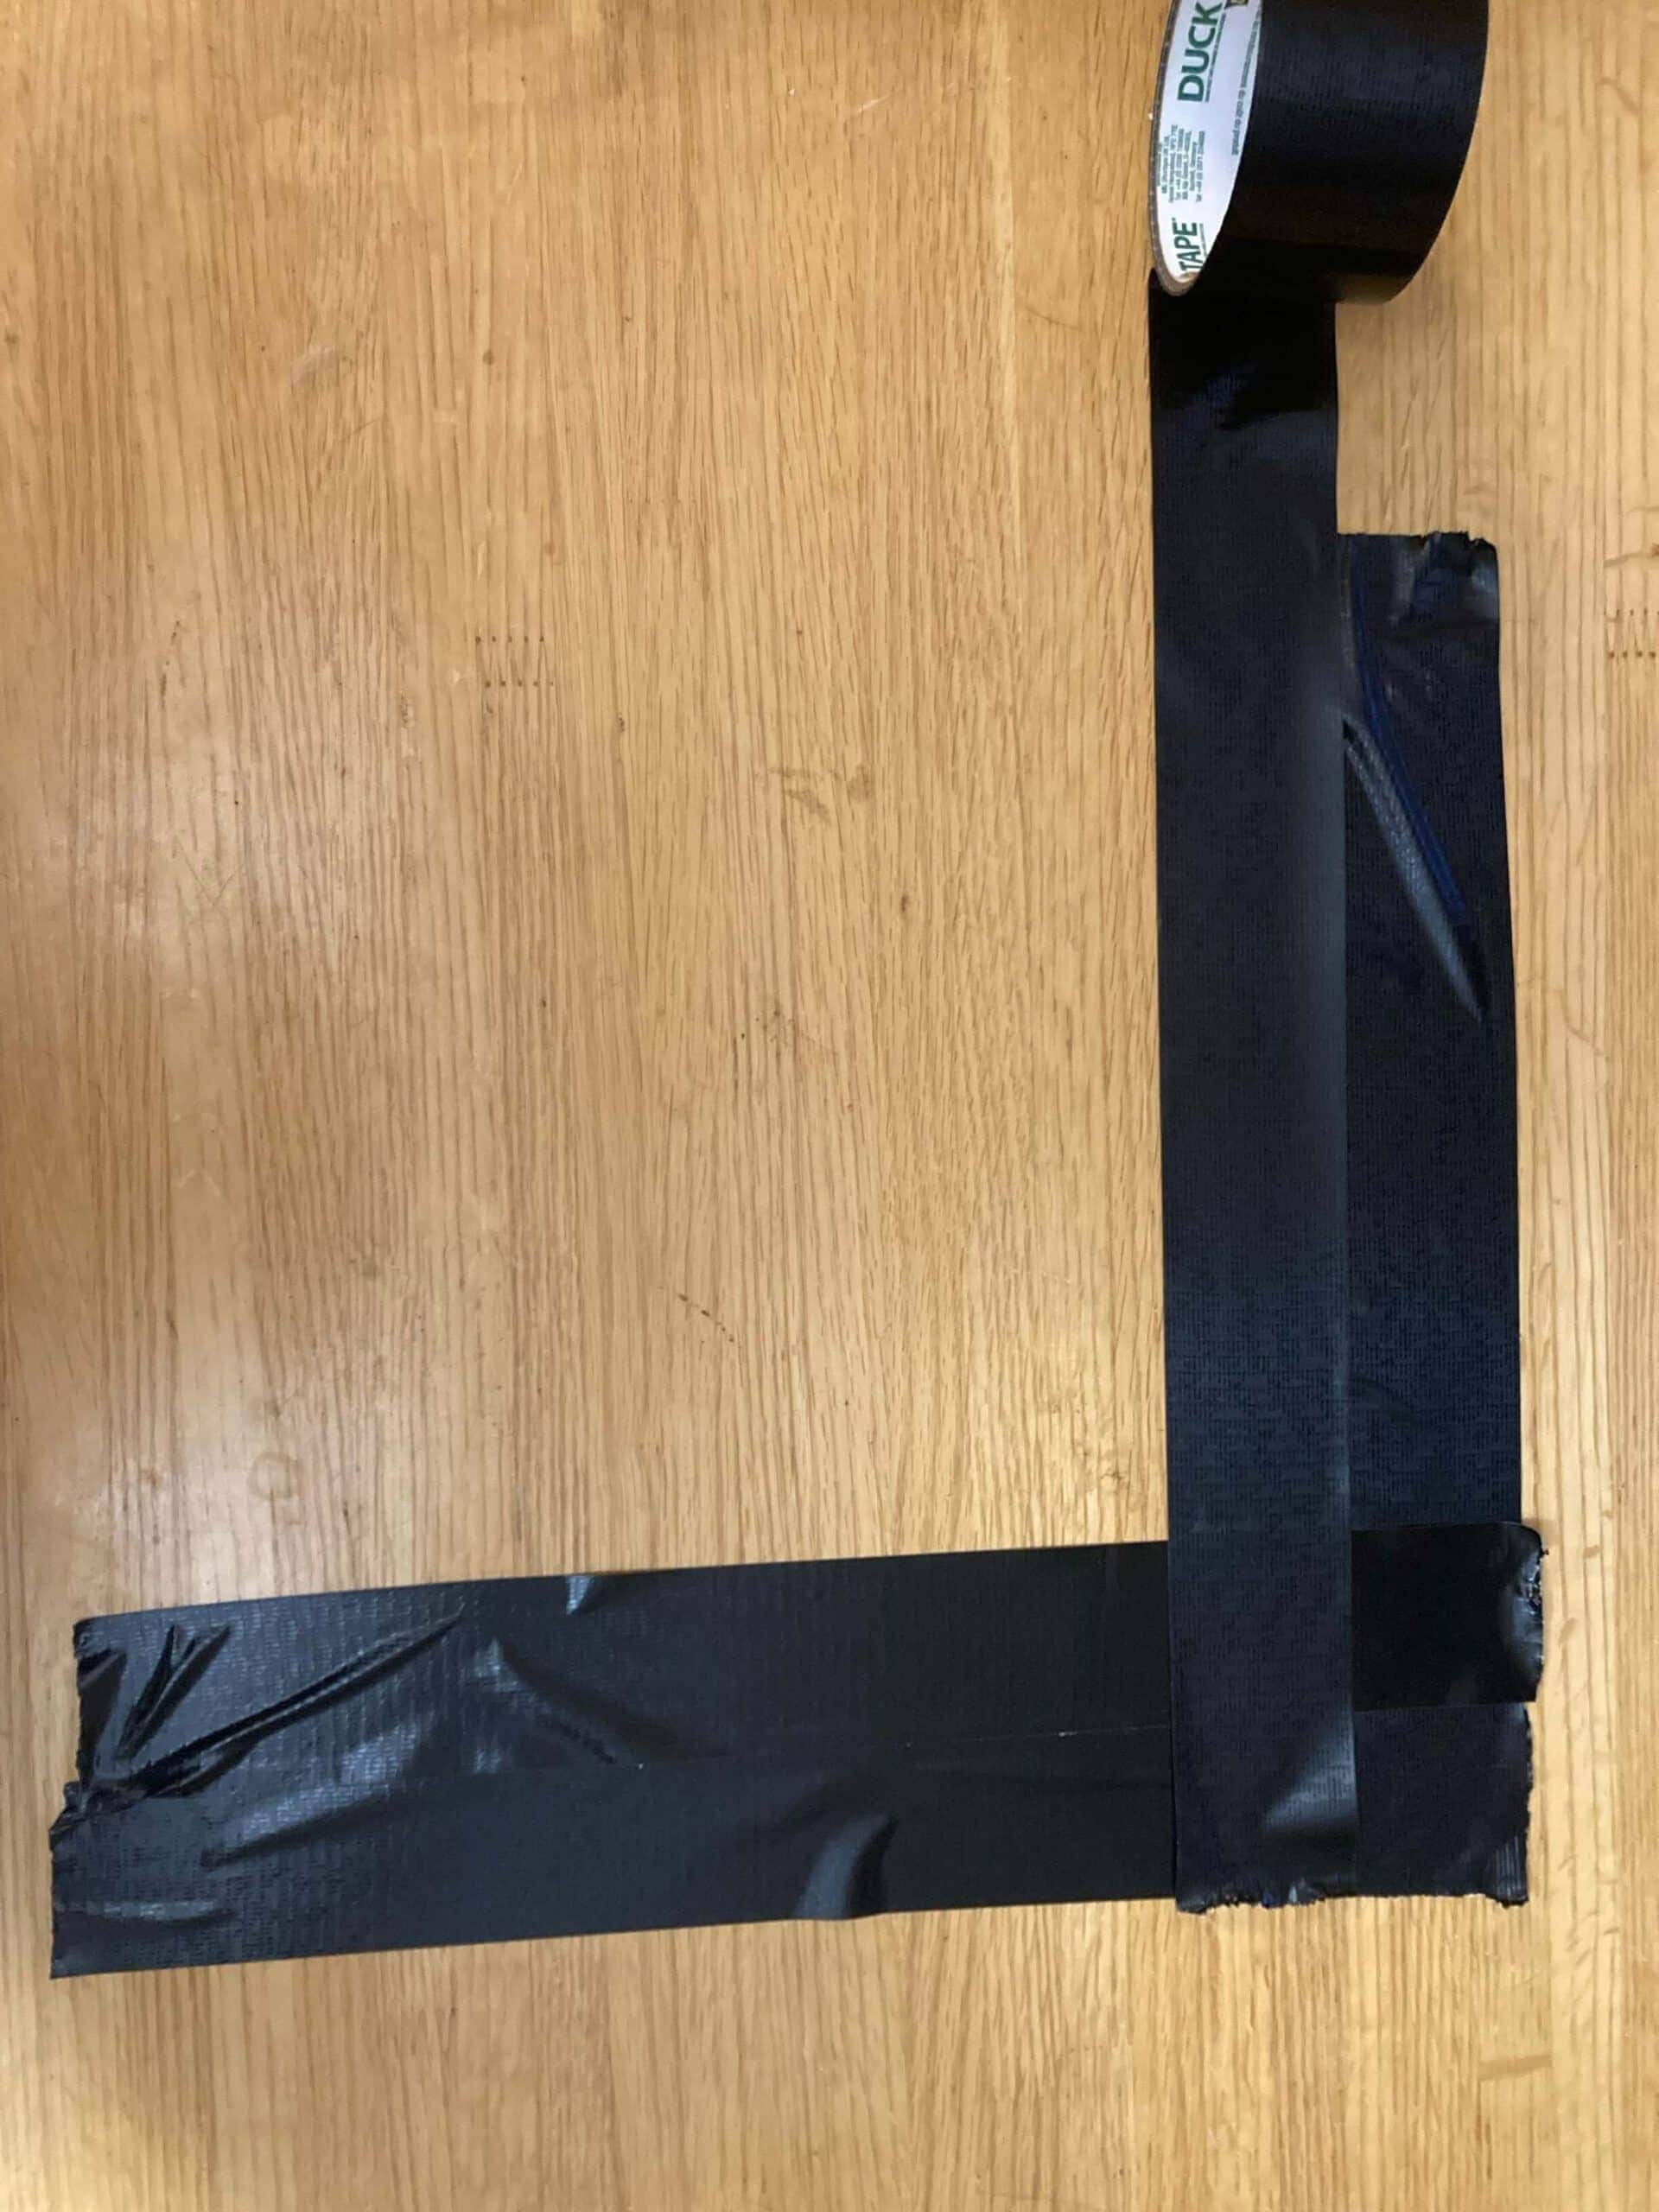
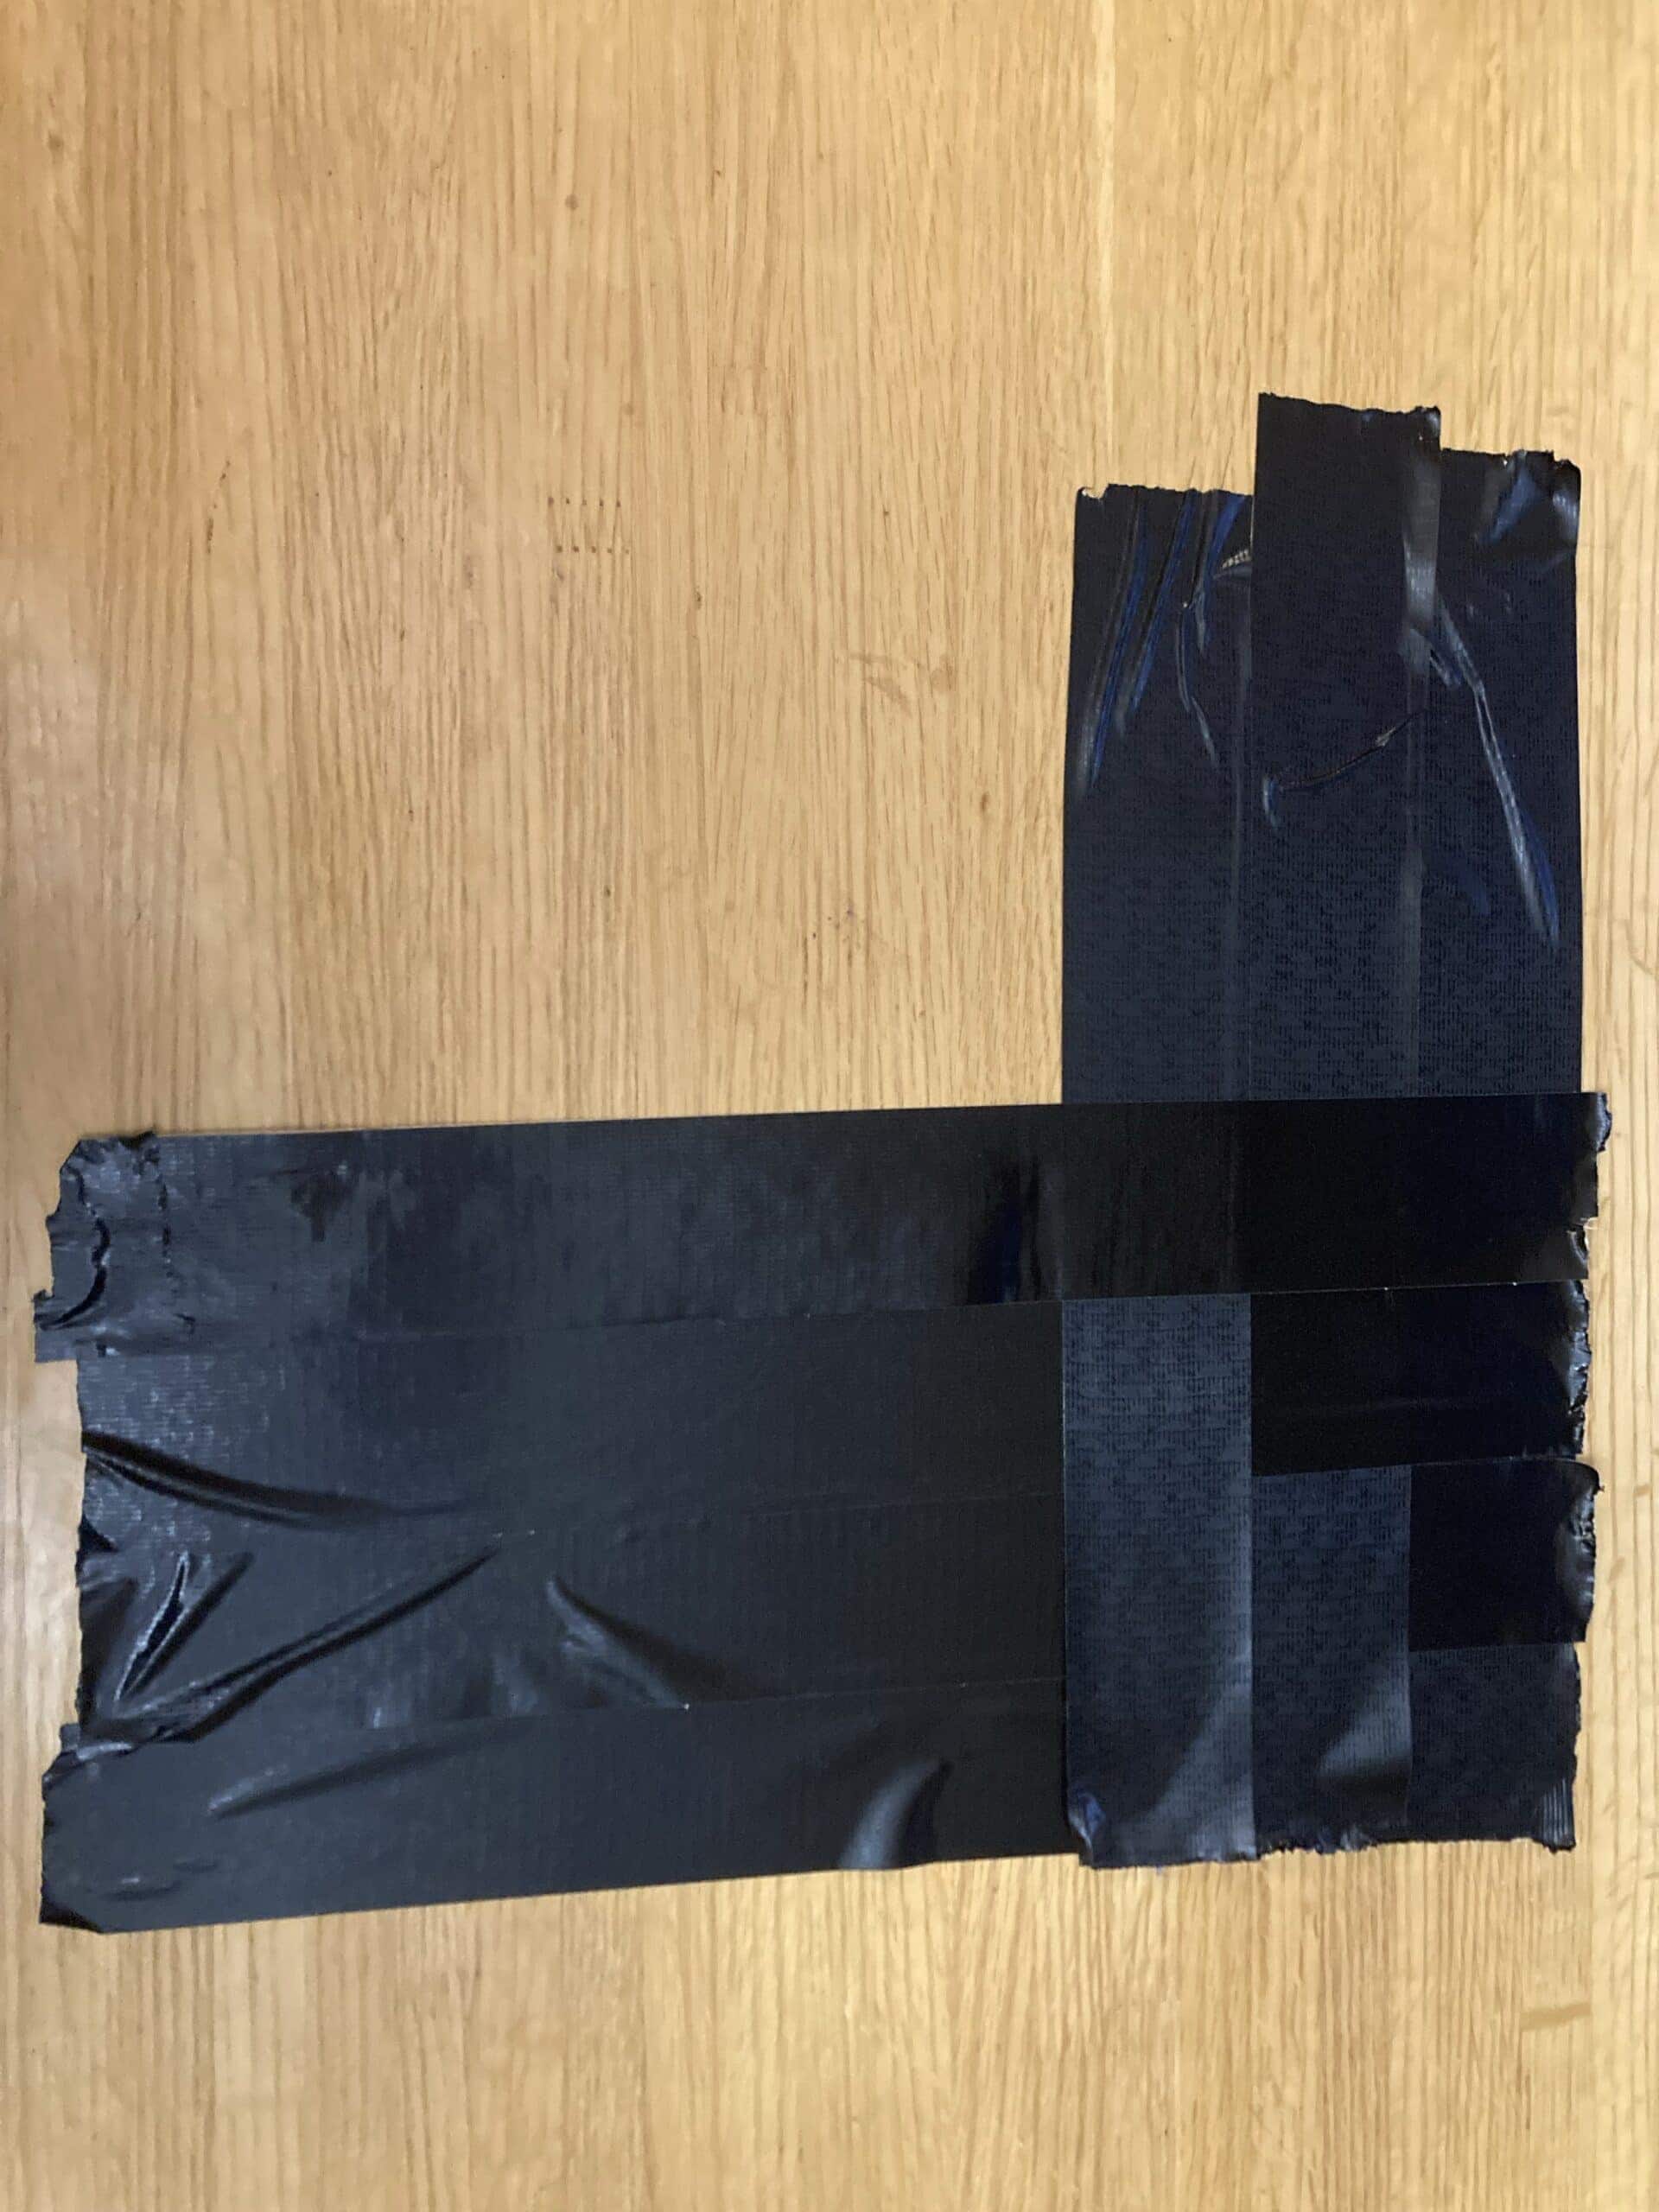
The diameter of your duct tape patch should be wide enough to cover the bottom of your horse’s foot and a portion of the hoof wall. [5]
Depending on the conditions your horse lives in, you may want to make several duct tape patches to provide additional wear resistance. [5] This is particularly important for horses living on rough, abrasive terrain such as rocks, concrete, or sand.
2. Apply Primary Layer
Once you have your duct tape patch created, you are ready to place the hoof bandage. Prepare your primary layer based on your veterinarian’s recommendations. Arrange your materials in a location that is easily accessible while you are lifting the horse’s foot.

As you are changing bandages, make sure you remove the old bandage and start applying the new bandage without setting your horse’s hoof down to maintain cleanliness of the injured area. Alternatively, your veterinarian may recommend setting your horse’s hoof down on a clean surface, such as a towel, if necessary.

Pick up your horse’s foot and apply the primary layer over the injury site.
3. Apply Tertiary Layer
Once the primary layer is in place, cover it with the tertiary layer.
If you are using cotton padding and gauze: [6]
- Trim the padding to the shape of the hoof using bandage scissors
- Place the cotton padding on the bottom of your horse’s foot
- Wrap brown gauze or elastic adhesive bandage around the hoof in a figure-8 pattern, crossing the bandage over the bottom of the hoof until the padding is entirely covered
Do not wrap the coronary band, heel bulbs, or other skin tissues within the wrap unless directed to do so by your veterinarian.

If you are using a diaper: [6]
- Place the diaper on the hoof and wrap the wings around the hoof wall
- Secure the diaper in place using a thin layer of elastic adhesive bandage or brown gauze wrapped in a figure-8 pattern
If your bandage includes a polythene bag: [2]
- After placing the diaper or cotton padding layer, insert the horse’s foot into the polythene bag
- Using bandage scissors, cut the bag to reduce its height to just below the level of the coronary band
- Secure the bag in place with elastic adhesive bandage


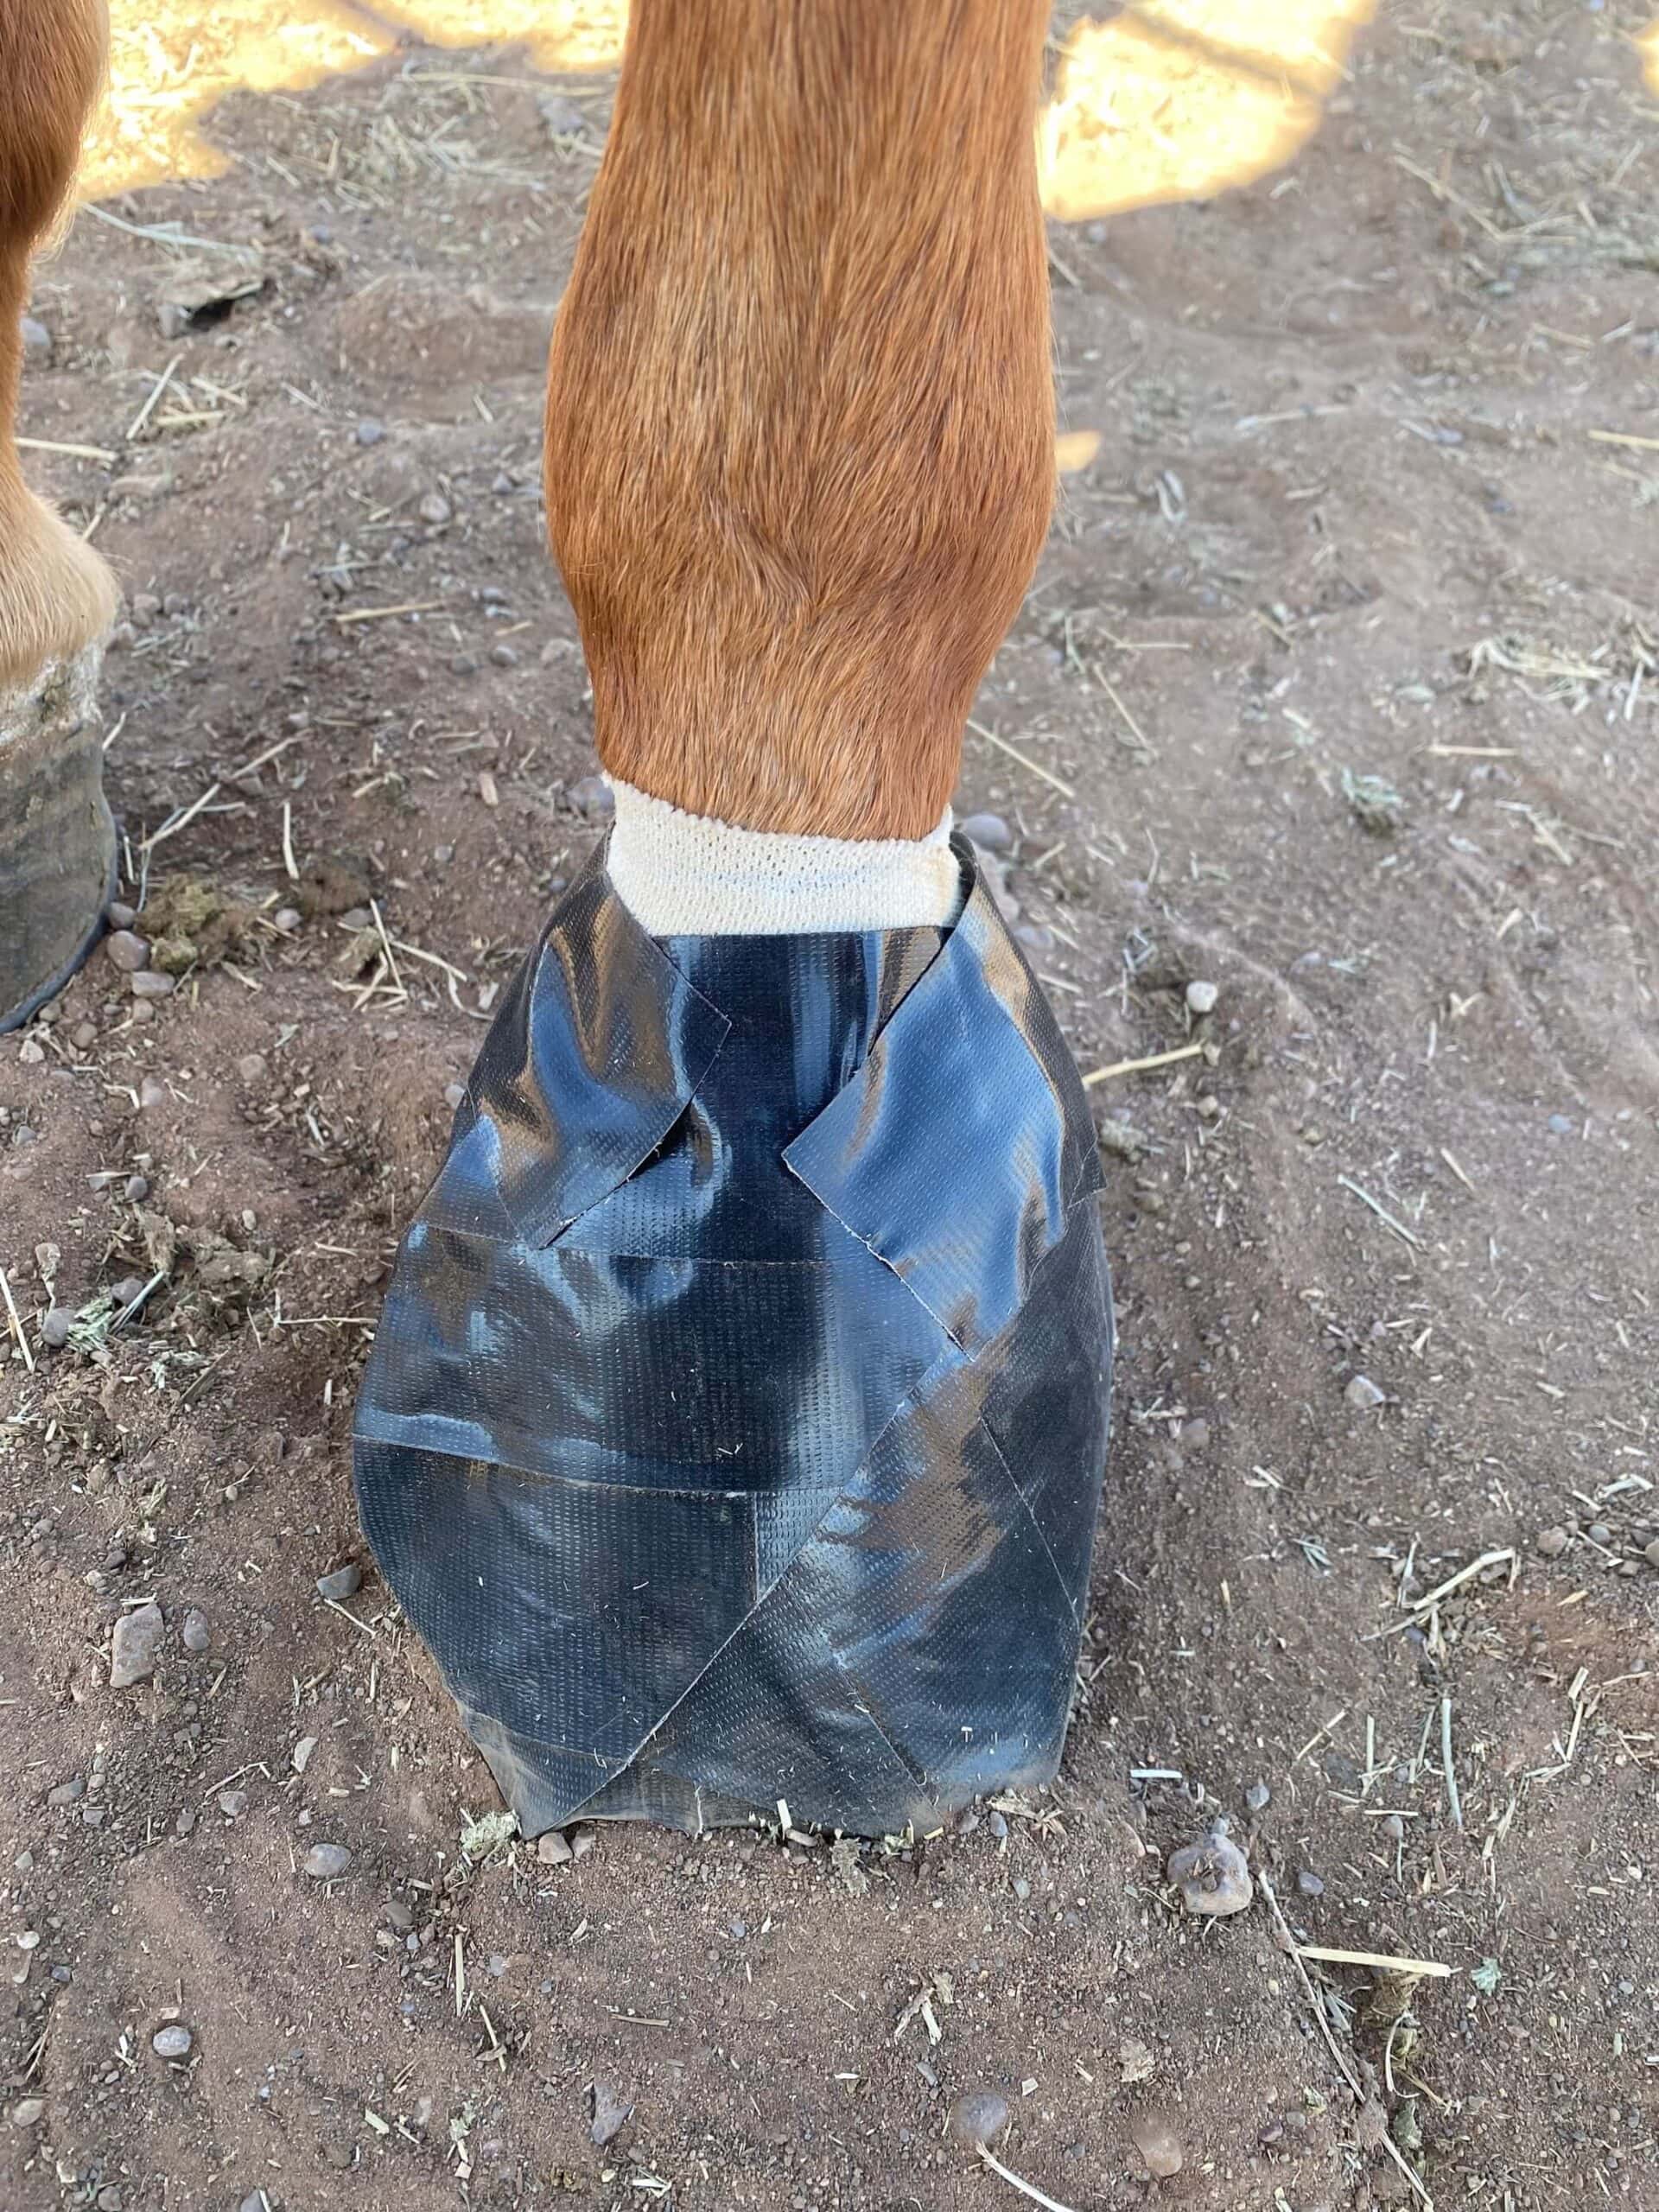
4. Cover With Duct Tape Patch
Once your tertiary layer is in place, you can apply the woven duct tape layer. To do so: [5][6]
- Center the duct tape layer over the bottom of the foot and place the foot on the ground.
- Make cuts in the duct tape from each corner towards the horse’s foot to allow the square to conform to the shape of the horse’s foot when folded.
- Pull the edges of the duct tape up and around the hoof, ensuring the duct tape does not contact the horse’s coronary band or skin.
- Trim the corners of the duct tape as necessary.
- Wrap several layers of duct tape around your horse’s hoof wall, perpendicular to the ground. This helps prevent the corners or edges of the duct tape patch from loosening.
- Wrap a strip of elastic adhesive tape around the bandage that straddles both the top of the duct tape and the horse’s skin. Ensure this layer is loose so it does not constrict blood flow to the hoof. This layer seals the top of the bandage and prevents debris from falling into the bandage.
Bandage Care
Once your bandage is complete, follow any other treatment and management recommendations made by your veterinarian. In most cases, a horse wearing a hoof bandage should be confined to a stall or small pen until their injury resolves. [7]
You should check the bandage several times a day to ensure it has not worn through or gotten wet. [7] Most horses wear through the duct tape at their toe first. [5] If you notice wear, but the bandage appears intact with no foreign material or wetness, you can repair the bandage using additional strips of duct tape 1-2 times per day. [5]
If your bandage wraps over the horse’s coronary band or heel bulbs, you should also check its tightness. You should be able to slip a finger between the horse’s skin and the bandage easily. [7] Also evaluate for any pressure sores or irritation where the bandage contacts the skin. [7] If your horse develops swelling, redness, or irritation in the bandaged area, contact your veterinarian for next steps. [7]
If your horse’s lameness worsens, swelling of the limb develops, or the horse shows signs of severe irritation such as chewing at the bandage, contact your veterinarian immediately. [7]
When to Change a Bandage
Always follow your veterinarian’s advice on bandage changing frequency.
In general, most bandages can be left in place for up to 4-6 days, assuming the bandage remains intact. [2] You should change the bandage if: [2]
- The external protective layer of the bandage wears through
- The absorbent material within the bandage is soaked
- There are any signs of foreign material or fluids entering the bandaged area
Keep a stock of bandage materials in your tack room or barn area to ensure they are accessible for bandage changes. Storing bandage materials in a plastic bin or tub helps keep them dry and dust-free.
If your bandage involves sugardine, you can make the product in advance and store it in a sealed container. Stir the mixture prior to use to ensure that there is no separation of the sugar and iodine solution. Do not keep the mixture for longer than 30 days to reduce the risk of bacterial contamination or mold growth.
Frequently Asked Questions
Here are some frequently asked questions about hoof bandages in horses:
Most horses fit a size 3 or 4 diaper. [5] Draft horses may need a size 5. You may need to experiment with different sizes depending on your individual horse's hoof conformation.
Most hoof bandages for abscesses stay on for around 48 hours. [8] Follow your veterinarian's recommendations about maintaining and changing the bandage.
You can stop bandaging a hoof abscess when it is no longer draining fluid, the remaining hole is dry, and the horse no longer shows signs of lameness. [8]
Ideally, horses wearing a hoof bandage should be on stall rest to keep the bandage as clean and dry as possible. [9] Limiting their movement also reduces wear on the bandage.
Summary
Applying a hoof bandage is an important skill for all horse owners to have for treating hoof injuries.
- Common reasons to apply a hoof bandage include hoof abscesses and puncture wounds
- Some bandages include poultices, antiseptics, or other products to treat the specific injury
- The most common materials used in hoof bandages are duct tape, elastic adhesive bandage, and gauze or cotton padding
- Always follow your veterinarian's recommendations on the type of bandage, bandage care and frequency of bandage changes
References
- Céleste. C. J. and Szöke. M. O., Management of Equine Hoof Injuries. Veterinary Clinics of North America: Equine Practice. 2005. doi: 10.1016/j.cveq.2004.11.009.
- Knottenbelt. D. C., Handbook of Equine Wound Management. Saunders, London. 2003.
- Baxter. G. M., Ed., Adams and Stashak’s Lameness in Horses. Seventh edition. Wiley-Blackwell, Hoboken, NJ. 2020.
- Thal. D., Make & Apply Simple Sugardine Paste Hoof Poultice. Horse Side Vet Guide.
- Thal. D., Cover Hoof Using Duct Tape Bandage. Horse Side Vet Guide.
- Costa. L. R. R. and Paradis. M. R., Manual of Clinical Procedures in the Horse. Wiley Blackwell, Hoboken. 2018.
- Hoof and Lower Leg Bandage Application Guide. Davie County Large Animal Hospital.
- Cuomo. F., Horse Hoof Abscesses. University of Minnesota Extension.
- How to Soak and Wrap a Hoof. Genesee Valley Equine Clinic.