
 English

Braiding a horse’s mane is a valuable grooming skill used to keep the mane neat and create a polished look for shows and competitions. Whether you are preparing for a hunter round, dressage test, breed show, or keeping a long mane tidy, braiding can improve presentation and help protect the hair from tangles, dirt, and breakage.
Mane braiding traditions vary across riding disciplines and breed types. Every approach requires the right tools, appropriate preparation and careful technique to keep the horse comfortable.
Learning how to properly braid horse manes helps owners avoid common problems such as slipping braids, uneven sizing, root tension, and hair damage.
Keep reading to learn why horse manes are braided, which braiding styles are most commonly used, and how to keep braids neat, secure, and comfortable for your horse.
Braiding Your Horse’s Mane
Braiding a horse’s mane is a long-standing part of horse grooming and competition turnout. It also keeps the mane contained so it does not interfere with the rider, reins, or tack during competition.
There is no single correct way to braid a horse’s mane. Styles range from dozens of small, flat hunter braids to larger dressage buttons and running braids used for long manes.
The appropriate style depends on the horse’s discipline, breed, mane length, and thickness. Each method also differs in how the mane is sectioned, braided, and secured, so preparation and technique need to be adjusted accordingly.
Braiding Superstitions & Traditions
Like many long-standing grooming practices, mane braiding has collected its share of show-ring traditions and superstitions. Some riders and grooms believe the number of braids matters, even when the choice has no formal effect on judging or performance.
One common tradition is to use an odd number of plaits on the neck, not counting the forelock. This convention is common in English turnout, where braid counts are often chosen for balance, symmetry, and the way they flatter the horse’s neck. [1]
Other superstitions focus on avoiding unlucky numbers. Some horse-world folklore warns against certain braid counts, including the belief that an odd number of braids can bring bad luck or that 13 braids should be avoided. [2]
Braiding techniques should prioritize the horse’s comfort, mane type and discipline expectations. The number of braids can also be chosen to flatter the horse’s neck, create even spacing, and match the style expected for a particular breed or class.
What's your top priority with your horse's health?

What's your top priority with your horse's health?
Reasons for Braiding Your Horse’s Mane
Horse owners braid manes for several reasons, including competition judging, grooming, breed presentation, and mane maintenance. The right style of braid depends on the horse’s discipline, mane length, hair thickness, and how long the braids need to stay in place.
Competition Requirements
Braiding is not required in every discipline or competition, but it remains a long-standing tradition and is widely recognized as a mark of a well-turned-out horse. In many English-style disciplines, a neatly braided mane is viewed as an unspoken standard of professional turnout.
Under United States Equestrian Federation (USEF) rules, braiding is allowed but not required in dressage. [3] Some divisions, such as side saddle, do mandate braiding. [3]
Many riders braid manes as a sign of respect for the sport. Extravagant decorations, such as ribbons, flowers, or glitter, are prohibited except for a single red ribbon in the tail to warn that a horse may kick. [3]
While neither USEF nor the United States Hunter Federation (USHF) rules explicitly require braiding in hunter divisions, a neatly braided mane is considered part of traditional hunter turnout. [3][4] It is strongly expected, especially at rated events and national-level competitions.
In United States Eventing Association (USEA) competition rules, braiding is also listed as optional, but it is frequently practiced in the dressage phase, especially at the upper levels. [5] Many eventers choose to braid because it creates a polished, professional appearance and highlights the horse’s neck and topline.
In Western disciplines, the mane is usually left natural and unbraided to reflect working-horse tradition. However, banding, which secures small sections of mane with elastics to create a neat, flat look, is common in breed shows hosted by the American Quarter Horse Association (AQHA) and the American Paint Horse Association (APHA). [6]
Grooming Benefits
Braiding offers functional benefits beyond appearance or competition requirements. It helps control long or thick manes, prevent tangles, minimize breakage from frequent brushing, and protect the hair from dirt, matting, and sun bleaching.
It also reduces friction and abrasion during turnout or transport. [7]
One common grooming challenge is training the mane to lie flat on one side. Regular washing, paired with consistent braiding, can help the mane stay neatly to one side while supporting overall hair condition. [7]
Breed & Traditional Practices
Mane braiding traditions often reflect a breed’s history and cultural presentation standards. For example, Baroque breeds such as Andalusians, Friesians, and Lusitanos are frequently shown with an elegant running braid to highlight their neck and breed type. [8]
Horses in combined driving events often have manes braided with colorful yarn or ribbons, a nod to agricultural and ceremonial traditions still seen in FEI driving competitions.
Preparing to Braid Your Horse’s Mane
Neat, lasting braids start with proper mane preparation. A clean, detangled, and appropriately trimmed mane is easier to section evenly, braid tightly, and secure without causing unnecessary pulling or discomfort.
Taking time to prepare the mane helps the finished braids look neater, last longer, and supports healthy hair condition.
Washing & Conditioning
Begin with a clean, healthy mane foundation. Thoroughly wash and condition the mane, focusing on the roots and under the hairline, then rinse well. A thorough rinse helps remove residue that could attract dirt or weigh the hair down, supporting overall hair health and shine. [7]
Using a leave-in conditioner once the hair is fully dry can help restore natural oils and improve manageability. After grooming or bathing, braiding helps maintain the mane’s condition by reducing breakage, guarding against matting, and protecting it from UV fading. [7]
Trimming or Pulling
Next, determine whether trimming or pulling is appropriate for the braid style. Both methods shorten the mane, but they create different results. Trimming cuts the hair straight across with scissors or clippers, making it a quick option for basic tidying. However, it can leave a blunt, thicker edge that is harder to divide into smooth, uniform braids.
Pulling removes longer hairs from the root to shorten and thin the mane at the same time. This creates a more natural, tapered finish and is often preferred for tight, uniform braids used in disciplines such as hunter and dressage. A pulled mane is usually easier to section evenly and braid close to the crest. [7][9]
Mane pulling should be done gently and in small amounts, especially with sensitive or reactive horses, to prevent root tension and skin irritation. Splitting the process into multiple short sessions can help minimize discomfort and reduce stress for the horse. [7]
Prepare Braiding Tools
Once the mane is clean and correctly sized, gather your tools before you start. This helps keep each braid consistent and prevents unnecessary interruptions while you work.
- Wide-toothed comb or stiff dandy brush for detangling
- Braid elastics or yarn for securing
- Additional tools depending on the desired finish, such as grooming or braiding sprays
Light grooming or braiding sprays are designed to improve grip and control during braiding and styling. A dedicated mane brush or comb can also help separate sections cleanly without pulling unnecessarily. [9]
Pro Tips for Effective Braiding
Mastering the basics of braiding depends on more than simply creating a neat plait. Good braiding technique requires handlers to pay attention to subtle factors such as the braider’s posture, braid section size, and appropriate securing of ends to keep their horse comfortable and produce a polished braid.
Posture & Positioning
Maintain a comfortable, balanced stance while braiding to reduce strain on your back and shoulders. Work at the horse’s wither height and adjust your position frequently to avoid overreaching or hunching as you move down the neck. [9]
Using a sturdy step stool for taller horses can help keep your hands and wrists aligned, making braiding more efficient and less tiring. [9]
Sectioning & Measuring
Symmetrical braids begin with consistent sectioning. Use your comb to measure and separate equal-sized sections along the mane, working from the poll to the withers. You can band each section before beginning to braid to help keep braids consistent in size.
Keeping each section uniform in width allows the braids to sit evenly and creates a professional, balanced appearance in the show ring. [7]
Securing the Ends
Once a braid is complete, secure it firmly but without excessive tension to prevent discomfort or hair breakage. Elastic bands or yarn can be tied neatly at the end of each braid, depending on the method, then tucked and fastened for a polished finish. Smooth, secure ends help the braids last longer and maintain a tidy look. [7][9]
Adjusting for Mane Thickness
Thick manes may require smaller, tighter sections to keep braids lying flat, while thin manes often look best with slightly larger sections to create a fuller appearance. Adjust your technique to the horse’s mane type, adjusting tension and section size so the finished braids are comfortable, secure, and visually balanced. [9]
Popular Braiding Styles & How to Do Them
Braiding styles vary by discipline, breed tradition, and the length or texture of the mane. The following are some of the most common braiding techniques, along with tips for achieving a polished, professional look. Like any skill, braiding improves with repetition. Over time, you can develop the technique and consistency needed to create your ideal look.
Table 1. Horse mane braid styles comparison
| Braid style | Best for | Ideal mane length | Typical look | Key notes |
|---|---|---|---|---|
| Hunter braids |
|
|
|
|
| Button braids |
|
|
|
|
| Running braid |
|
|
|
|
| Dutch braid |
|
|
|
|
| Scalloped or loop braids |
|
|
|
|
Hunter Braids
Hunter braids, also known as flat braids, are distinguished by their small, closely spaced, uniform appearance. They are typically laid neatly along the crest of the neck and are common in U.S. hunt seat, hunter, and sport horse competitions. [10]
While not explicitly required by USEF or United States Hunter Jumper Association (USHJA) rules, braiding remains a widely observed tradition in rated competitions under their governance. [9]
Ideal Mane Length
To achieve the tight precision required for hunter braids, the mane should be pulled or trimmed to an ideal length of around 4 to 5 in (10 to 13 cm). This length is long enough to hold a tidy braid but short enough to lie flat and maintain precision along the neck. [10]
Step-by-Step Basics
These basic steps help create the small, flat braid pattern expected in traditional hunter turnout: [9][10]
- Prepare the mane: Begin with a clean, pulled, or trimmed mane of appropriate length. Assemble yarn or bands and a comb.
- Section evenly: Use a comb or clip to divide the mane into equal-width sections, typically 1.5 to 2 in (3 to 5 cm) wide. Adjust based on your planned braid count, with an ideal total of 30 to 40 uniform braids.
- Braid each section: Start at the poll and braid a standard three-strand braid for each section, working tightly down the neck while keeping it flat and uniform. Braid in yarn as you go for yarn-braiding methods. Forelocks are often French braided and tucked under.
- Secure the braid: Fold the braid up and fasten it with a Quick Knot, tie it with yarn, or use bands. Pull the braid up and anchor it neatly under the crest for a polished finish.
- Finish the row: Tuck and tighten each braid carefully so the braids do not poke outward and remain neat for the duration of the class.
Button or Rosette Braids
Button braids, also called dressage braids, form neat, round knots along the crest to give the neck a clean, elegant outline. They are the accepted standard for dressage turnout at both national and Fédération Equestre Internationale (FEI) levels. While not required, most riders braid to present a polished, professional look in the arena. [11]
Braiding styles in eventing dressage and traditional dressage can differ in spacing. In eventing, braids are typically smaller and placed closer together, similar to hunter braids. In traditional dressage, they are usually larger and spaced farther apart. [12]
Ideal Mane Length
For button braids, aim for a mane length of approximately 5 to 6 in (13 to 15 cm). This gives each braid enough volume to roll or fold into a pronounced, uniform button while remaining manageable along the crest. The slightly longer length, compared to hunter braids, supports the rounded profile preferred in dressage turnout. [11]
Step-by-Step Instructions
Button braids depend on even spacing, consistent folding, and careful finishing so each button sits at a similar height. To braid your horse’s mane in this style: [7][11][12][13]
- Prepare the mane: Start with a clean, evenly pulled or trimmed mane at the target length. Decide roughly how many buttons you want so spacing is consistent from poll to withers. Assemble yarn or bands and a comb.
- Section the mane: Use a comb to create equal-width sections, about 2 to 2.5 in (5 to 6 cm) wide. Measure as you go, keep widths uniform, and balance the count from poll to withers so the final number of buttons is equal on either side of the central braid. The braid count depends on whether you are aiming for eventing dressage spacing, commonly 16 to 21 braids, or traditional dressage spacing, commonly 9 to 22 braids.
- Braid each section: Braid each section with consistent tension from crest to ends, and braid in yarn if using this method. A standard three-strand braid is typical for button braids. Even tension helps every button roll to the same diameter and prevents some knots from sitting higher or lower than others. Forelocks are often French braided and tucked under or braided into a button.
- Form the buttons: Fold each braid the same way and the same number of turns so the knot sits snugly on the crest. Secure with yarn or bands, using the same number of wraps for a uniform size. To form the button, fold the braid end up toward the base, then fold again to create a small, rounded knot.
- Roll if needed: If folding is not ideal, tightly roll the braid from the end up toward the crest, similar to rolling a hunter braid, and secure it with a rubber band.
- Secure the button: Secure the folded braid with a rubber band placed tightly around the base of the button. For thicker manes, multiple rubber bands may be needed.
- Sew for extra security: For a more secure and refined finish, some braiders sew the braid into place with yarn. This method uses a needle and thread to stitch the braid into the desired button shape.
- Finish the row: Step back and sight down the neck from both sides. Nudge any button that sits off-line, adjust tension where needed, and smooth flyaways so the row reads as one clean, level line.
Running Braid
A running braid, or French braid along the crest, is ideal for long, heavy manes like those of Friesians. It keeps the mane neat while showcasing the neck, lies close to the crest to prevent bulk, and supports the grooming needs of breeds with long, thick hair. [14]
Step-by-Step Instructions
A running braid preserves mane length while keeping the hair controlled along the neck. To braid a running braid: [7][14]
- Prepare the mane: Start with a clean, fully dry, detangled mane, working with the mane on its naturally parted side. Gentle handling reduces breakage, so use small sections and ease tension near the roots.
- Start at the poll: Take a small top section and begin a French braid along the crest, adding equal-width sections of mane as you move toward the withers. Aim to keep the braid seated high on the crest for a tidy line. Stay consistent in parting the hair and work methodically with bands or thread.
- Maintain even tension: Keep tension snug but not tight, especially at the roots. Starting loose at the base and tightening as you go helps avoid skin stress while achieving a uniform look.
- Finish and secure: When you reach the withers, continue a simple three-strand braid to the ends and secure with yarn or bands. Tuck or stitch the tail of the braid neatly so it lies flat.
- Check the result: Review from both sides. If any portion sits off-line, adjust the section size or tension locally. A light, non-greasy grooming spray can help control flyaways without adding weight.
Scalloped or Loop Braids
Scalloped or loop braids create a series of evenly spaced arches along the horse’s neck for a bold, eye-catching look. Often seen in dressage, hunter, and jumper arenas, this style blends functionality with decorative turnout.
Scalloped braids are made by securing evenly spaced three-strand braids so part of each braid loops outward, creating a symmetrical pattern along the crest. This style adds visual interest without fully covering the mane.
Step-by-Step Instructions
This style depends on even loop height and careful tension so the finished pattern looks balanced from poll to withers. To braid scalloped or loop braids: [7][15]
- Prepare the mane: Start with a clean, detangled mane at the desired length. A slightly longer mane than for hunter braids works best, so the loops have enough hair to stand out.
- Section the mane: Use a comb to divide the mane into evenly spaced sections from the poll to the withers. The number of sections determines how many loops you will create.
- Create base braids: Create a tight three-strand braid with each section, braiding only partway down so enough hair remains to form the loop. Secure the braid with an elastic.
- Form the loops: Use a latch hook or similar tool to pass through the center of the braid near its base. Pull or fold the braid’s end upward toward the crest, leaving part of it exposed to form the scallop. Then, take the next section of mane, join it with the tail of the previous braid, and repeat the braiding and looping pattern down the neck.
- Secure each loop: Fasten each loop in place with yarn or elastic at the base so it sits evenly against the crest. Maintain consistent tension and height for symmetry.
- Finish the pattern: Step back and check alignment. Adjust any loops that are uneven or out of place to ensure a balanced, uniform look from poll to withers.
Dutch Braid
The Dutch braid, also called a reverse French braid or inside-out braid, adds hair from underneath each strand to create a raised, three-dimensional braid along the crest. Positioned close to the neck, it accentuates the arch and holds its shape better than a running braid, making it useful for long manes prone to shifting.
Step-by-Step Instructions
The key difference in a Dutch braid is that each outer strand crosses under the middle strand, rather than over it. To braid a Dutch braid: [7][13]
- Prepare the mane: Start with a clean, dry, detangled mane and gather the necessary tools. Work on the mane’s natural side for the smoothest result.
- Start the braid: At the poll, divide a small top section into three equal strands. Cross each outer strand under the middle strand rather than over. First bring the right section under the middle, then bring the left section under the new middle.
- Add hair evenly: As you work down the crest, add small, equal sections of mane to each outer strand before crossing it under the middle. Keep the sections uniform to create an even, raised braid, continuing to add hair from both sides and braid it under the middle strand.
- Maintain tension: Keep the braid snug to the crest without pulling too tightly at the roots. Consistent tension ensures the braid sits evenly along the neck.
- Finish the braid: When you reach the withers, braid the remaining hair in a standard three-strand braid, secure with a band or yarn, and either leave it loose or tuck it neatly under for a polished look.
- Check alignment: View the braid from both sides to ensure it is straight, evenly raised, and follows the line of the neck. A light, non-greasy grooming spray can help control flyaways.
How to Make Braids Last: Common Braiding Problems & Tips
Even well-prepared braids can loosen, shift, or rub if the mane is too slick, sections are uneven, or the horse becomes restless. The following issues are common and can usually be managed with small adjustments to preparation and technique: [7]
- Braids slipping out: This can happen if the mane is too clean and slick or if the tension is inconsistent. Lightly dampening the mane or using a grip-enhancing spray can help secure strands.
- Uneven braid sizes: Section the mane evenly from poll to withers for a balanced look. Use a comb to keep widths consistent, and secure each section with clips or bands before braiding to maintain uniformity.
- Fidgety horses: Work in short sessions, take breaks often, and consider having a helper hold the horse. Regular braiding practice can improve a horse’s patience, especially when paired with calm, consistent horse handling.
These additional strategies can help keep your horse’s braids neat and secure, especially during overnight stabling, travel, or multi-day competitions: [7]
- Appropriate braiding sprays or gel: Use products designed to add grip without leaving heavy residue that attracts dirt.
- Wrapping overnight: Cover braids loosely with a lycra hood or other neck cover to prevent rubs while keeping them tidy.
- Daily checks: Check each morning for loose or fraying braids and redo them as needed to maintain a neat, even turnout. Small daily checks are especially useful at shows, where travel, stabling, and repeated classes can make braids loosen sooner than expected.

When & How to Remove Braids
Remove show-day braids promptly after competition to prevent irritation, rubbing, and hair breakage. Tight braids, wet braids, or braids left in after heavy sweating can place extra tension on the roots and may make the horse itchy or uncomfortable. At multi-day shows, it is best to remove braids each evening and rebraid the next day.
For less complicated braid styles used for routine mane management, take them out within 7 to 10 days, especially if you notice dirt buildup, loose sections, broken hairs, rubbing, or signs your horse is becoming uncomfortable. Braids should also be removed sooner if they become wet, tangled, overly tight, or start pulling unevenly on the mane.
To take braids out safely, avoid pulling on the mane. Use a seam ripper, small scissors, or a braiding tool to cut the yarn or bands carefully, making sure not to nick the hair. Gently unravel each braid with your fingers before using a wide-toothed comb.
Once the mane is braid-free, brush gently to remove loose hair and check the crest for rubbed skin, flaking, swelling, or sensitivity. If the mane feels dry or tangled, apply a light detangling or conditioning product and allow the hair to rest before braiding again. [7]
Nutrition for Mane & Tail Health
Healthy mane and tail growth starts with the overall diet. Poor nutrition, low protein intake, vitamin and mineral imbalances, or inadequate calorie intake may show up as slow growth, dull hair, breakage, or poor coat condition over time. [16]
A balanced, forage-based diet should provide the foundation. High-quality forage supports digestive health and supplies energy and protein that contribute to normal hair growth. However, forage alone may not meet every horse’s vitamin and mineral needs. [17]
Hair is made primarily of keratin, a structural protein that also forms hooves and the outer layer of the skin. Nutrients such as amino acids, zinc, copper, and biotin all contribute to normal keratin formation. [16] Biotin is commonly included in hoof, coat, mane, and tail supplements because it supports the production of strong, healthy keratin when supplied consistently as part of a balanced diet.
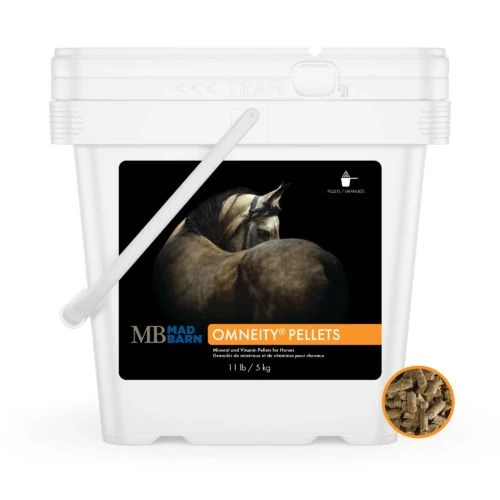
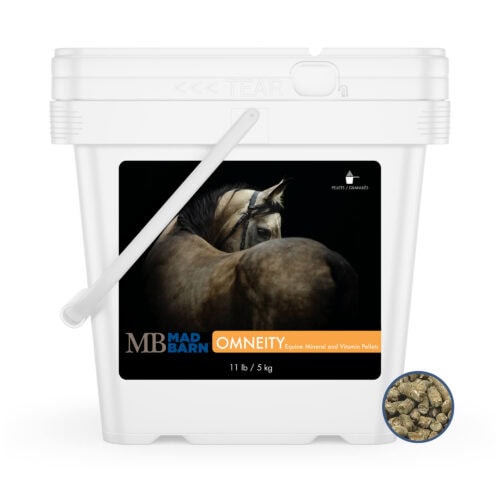
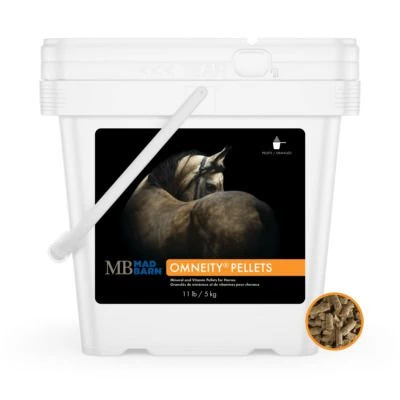
For horses that need support meeting daily vitamin and mineral requirements, Omneity® provides a comprehensive blend of vitamins, minerals, amino acids, and biotin to help support normal hoof, coat, mane, and tail health. Omneity® is designed to complement a forage-based diet and contains a full serving of biotin to support healthy hair and hooves.
Skin health also plays an important role in mane and tail quality. The skin produces sebum, a natural oil that helps condition the hair shaft, support the skin barrier, and maintain coat shine. Dry, flaky, irritated, or poorly nourished skin can contribute to rubbing, breakage, and a dull appearance.
Omega-3 fatty acids support skin and coat health by contributing to a healthy inflammatory response and helping maintain the skin’s natural barrier function. Horses that do not receive enough essential fatty acids may develop poor hair quality, dry skin, or a dull coat.
Adding healthy omega-3 fatty acids from fat sources like oils can help support natural skin oil production, improving hair texture, gloss, and overall coat appearance as part of a balanced feeding program. [18]
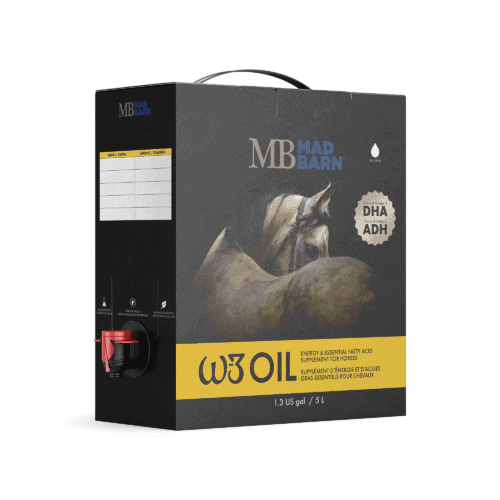
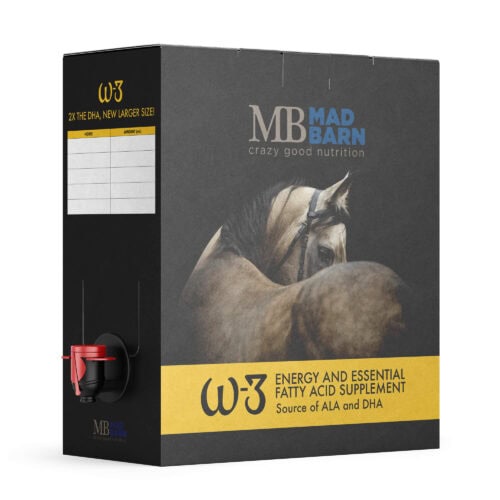
W-3 Oil provides a concentrated source of omega-3 fatty acids, including DHA, along with natural vitamin E, in a palatable, plant-based oil. It can be added to the diet to support skin health, coat shine, and overall wellness without adding unnecessary sugar or starch.
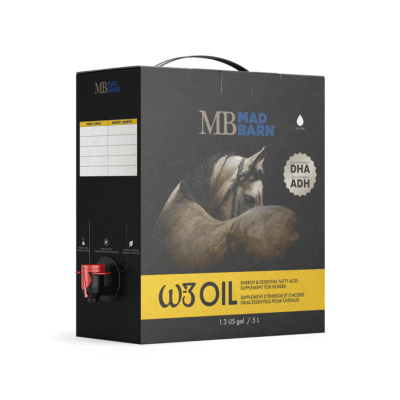
Nutrition cannot replace good grooming, appropriate braid removal, or veterinary care for skin disease, but it can help ensure the horse has the nutrients needed to grow and maintain healthy hair.
For best results, evaluate the whole diet rather than relying on one ingredient or supplement alone. Owners can work with a qualified equine nutritionist to review forage, feeds, supplements, and total nutrient intake, helping identify gaps that may be affecting mane, tail, coat, and overall health.
Frequently Asked Questions
Here are some frequently asked questions about braiding horse manes:
Braiding is not required for every horse show, but it is often expected in English-style disciplines. In dressage and eventing, braiding is generally optional under the rules, though many riders still braid for a professional appearance. In hunter divisions, a neatly braided mane is strongly associated with traditional hunter turnout, especially at rated and national-level competitions.
Western horses generally do not need their manes braided because many Western disciplines preserve a natural working-horse presentation. Instead of braiding, breed show competitors may use banding to divide the mane into small sections and create a flatter, neater look.
The best braid style depends on the discipline, breed, and mane length. Hunter braids are common for hunter and hunt seat turnout, button braids are widely used in dressage, and running braids are useful for long, thick manes on Baroque breeds or horses shown with natural mane length.
Prepare a horse's mane before braiding by washing, rinsing thoroughly, drying, and detangling the hair. A clean, manageable mane helps braids look smoother and makes sectioning more consistent. Depending on the braid style, the mane may also need to be pulled or trimmed to the correct length.
A horse's mane may be pulled or trimmed before braiding depending on the style and desired finish. Pulling is often preferred for tight, uniform hunter or dressage braids because it thins and shortens the mane more smoothly. Trimming can help with quick maintenance, but it usually does not create the same refined finish.
The tools needed to braid a horse's mane usually include a wide-toothed comb or stiff brush, braid elastics or yarn, and optional grooming or braiding spray. A comb helps detangle the mane and measure even sections, while elastics or yarn secure each braid.
Make horse mane braids even by measuring consistent sections from the poll to the withers before braiding. Use a comb to separate equal-width sections and keep tension consistent as you work. Banding each section first can help keep braid size more uniform.
Horse mane braids should be secure enough to stay in place but not so tight that they pull on the roots or cause discomfort. Excessive tension can contribute to irritation, breakage, or rubbing. Consistent, moderate tension helps the finished braids look neat while keeping the horse comfortable.
Hunter braids are small, close, uniform braids that lie neatly along the crest of the neck. They are also called flat braids and are commonly used in hunter, hunt seat, and sport horse competitions. The mane is typically pulled or trimmed short so the braids stay tight, flat, and precise.
Button braids are round, tidy knots formed along the crest of the neck, often used for dressage turnout. They are also called dressage braids or rosette braids and help give the neck a clean, elegant outline. They are usually larger and more pronounced than hunter braids.
A running braid is used to manage long, heavy manes while showing off the horse's neck. It is a French-style braid that follows the crest and keeps the hair tidy without requiring the mane to be shortened. This style is useful for horses with long manes, including Friesians, Andalusians, and Lusitanos.
A Dutch braid on a horse is a reverse French braid that creates a raised, three-dimensional braid along the crest. Instead of crossing each strand over the middle, the braider crosses the outer strands underneath while adding hair down the neck. This style can help long manes hold their shape and sit close to the neck.
Scalloped braids, also called loop braids, create a series of evenly spaced arches along the horse's neck. This decorative style keeps the mane organized while adding visual interest. It works best when the mane is long enough to form visible loops with consistent height and tension.
Horse mane braids may slip out if the mane is too slick, the sections are uneven, or the braiding tension is inconsistent. Freshly washed hair can be harder to secure if it has too little grip. Lightly dampening the mane or using a grip-enhancing braiding spray can help strands stay in place.
Braiding can damage a horse's mane if the braids are too tight, left in too long, removed roughly, or allowed to become wet and tangled. Tension at the roots can irritate the skin, while pulling or cutting carelessly during removal can break the hair. Careful technique and timely removal help reduce the risk of damage.
Show braids should usually be removed promptly after competition to reduce the risk of rubbing, irritation, and breakage. Simpler braids used for routine mane management should generally come out within 7 to 10 days, or sooner if the mane becomes wet, dirty, tangled, tight, or uncomfortable.
You can braid a horse's mane overnight before a show if the braids are secure, comfortable, and protected from rubbing. A loose neck cover or lycra hood may help keep braids tidy, but braids should be checked for tightness, fraying, and skin irritation the next day.
Safely remove horse mane braids by cutting the yarn or bands carefully and gently unraveling the hair. Avoid pulling on the mane, because tugging can damage the hair or irritate the roots. A seam ripper, small scissors, or braiding tool can help remove fasteners before finger-combing or using a wide-toothed comb.
Nutrition supports mane and tail health by providing the energy, protein, vitamins, minerals, and fatty acids needed for normal hair growth and skin function. A balanced forage-based diet, adequate amino acids, trace minerals, biotin, and omega-3 fatty acids can all help support healthy hair as part of overall care.
Summary
Braiding a horse’s mane creates a neat, polished appearance for shows while helping manage long or thick manes.
- Mane braiding traditions vary by discipline, breed, and competition expectations, with styles such as hunter braids, button braids, running braids, Dutch braids, and scalloped braids
- Proper preparation, including washing, conditioning, trimming or pulling, and gathering the right tools, helps braids stay neat and secure
- Consistent sectioning, even tension, and correct positioning are important for creating comfortable, balanced, professional-looking braids
- Common braiding problems include slipping braids, uneven sizing, fidgety horses, root tension, and braids loosening during shows or overnight
- Braids should be removed carefully and promptly to prevent irritation, rubbing, buildup, and hair breakage
References
- Q&A: How many plaits?. Horse & Hound. 2003.
- Butter-Stealing Witches and 9 Other Bizarre Superstitions about Horses. ASPCA. 2021.
- Dressage Rules & Equipment. USEF. 2026.
- USHJA Guide to Competition Rules. USHJA. 2026.
- Rule Refresher: Your Dressage Rules Cheat Sheet. USEA. 2020.
- 4-H Horse Project. OSU Extension Service. 2013.
- Swift. A. Pro Tip: Mane and Tail Care. US Equestrian. 2019.
- Salem. P. The Fairy Tale Friesian. FEI. 2020.
- Matsler. T. How to Braid a Horse's Mane. American Quarter Horse Association. 2018.
- Hunter Braids: The Mane Event. Practical Horseman. 2020.
- Scott. L. Dressage Braids: Button Up!. Dressage Today. 2025.
- VLOG: Olivia Towers' Braiding Tips. FEI. 2019.
- Johnson. R. Braiding Clinic. United States Eventing Association. 2009.
- How to Do a Running Braid for Long Manes. Young Rider Magazine. 2023.
- Rohaly. M. B. Braided Horse Manes: Why, How-to and Expert Advice. Braid Secrets. 2020.
- Geor. R. J. et al. Ed. Equine Applied and Clinical Nutrition: Health, Welfare and Performance. Saunders Elsevier. 2013.
- Nutrient Requirements of Horses: Sixth Revised Edition. National Academies Press. 2007.
- Bergero. D. et al. Blood Serum and Skin Fatty Acid Levels in Horses and the Use of Dietary Polyunsaturated Fatty Acids. Animal Research. 2002.